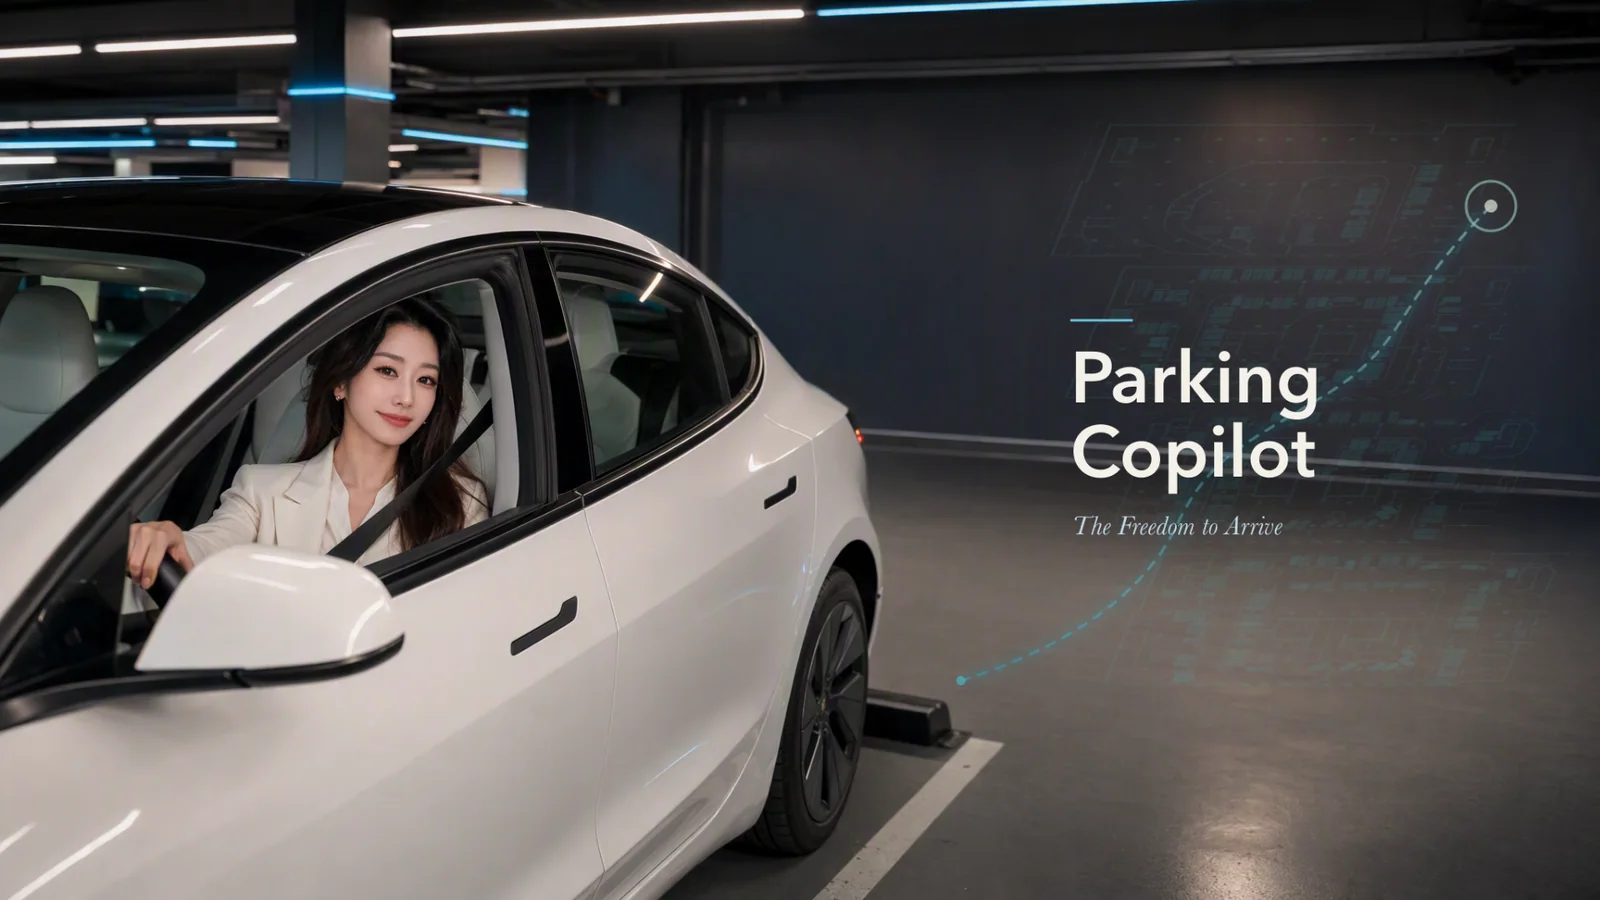
实录总览制作流程笔记
正在加载分享。需要联网获取Reveal.js;也可打开制作流程笔记。
Parking Copilot · Making of

一个停车idea,
怎样变成
两分钟短片?

构思、拆镜、制作、返工。
沿着真实画面,回到每一次选择。

Lexie在白车旁举起手机拍纪念照的第一幕选用静帧
Parking Copilot · The Freedom to Arrive

先看成片。

01 · 构思 / 视角的转变

从「AI 能做什么」,
到「她需要什么」。

Capability
AI 能做什么?基于历史停车数据,
借助 AI 预测、优化车位使用,
提升整体使用率。
停车场管理员的视角面向高层,讲运营效率。
User Experience
她需要什么帮助?她在哪些时刻遇到困难?
怎样让她知道下一步?
日常停车的员工视角面向员工,讲切身体验。
Story
怎样把这些时刻串成故事?一名毕业不久的职场新人,
靠自己的努力买下第一辆车。
等待、停车、充电、找车四个触点,串成她的一段经历。

让观众在她的故事里,看见自己的日常。

01 · 构思 / 人物的起点

先让观众关心她,再让产品出现。

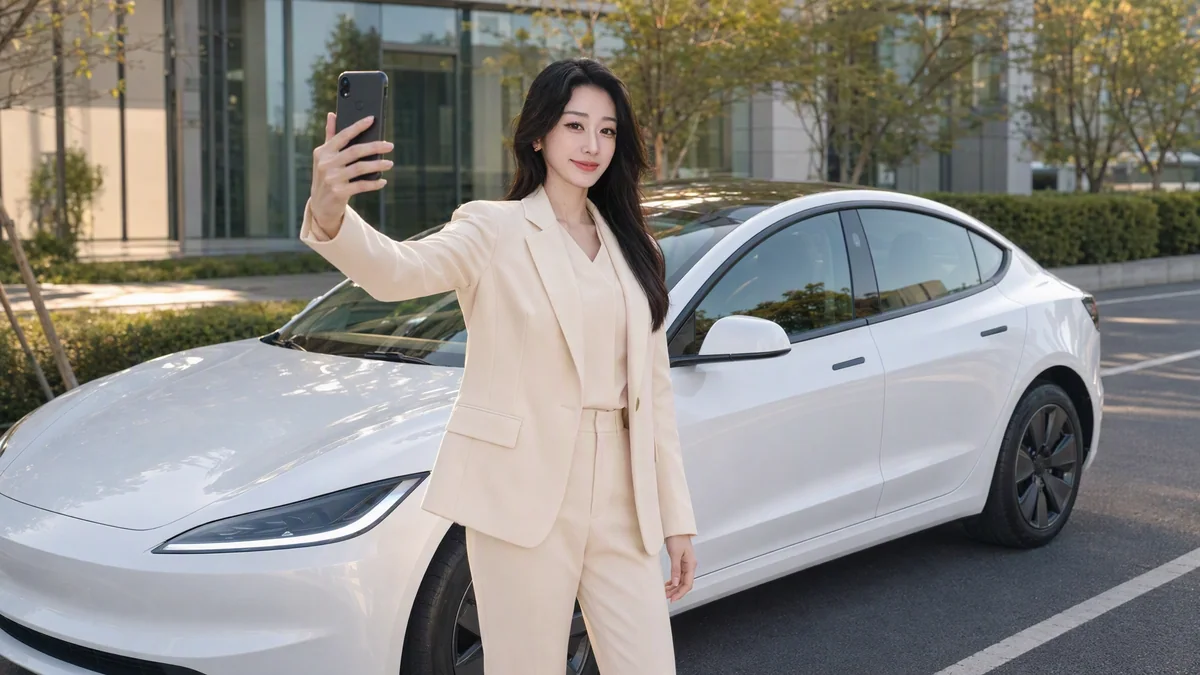
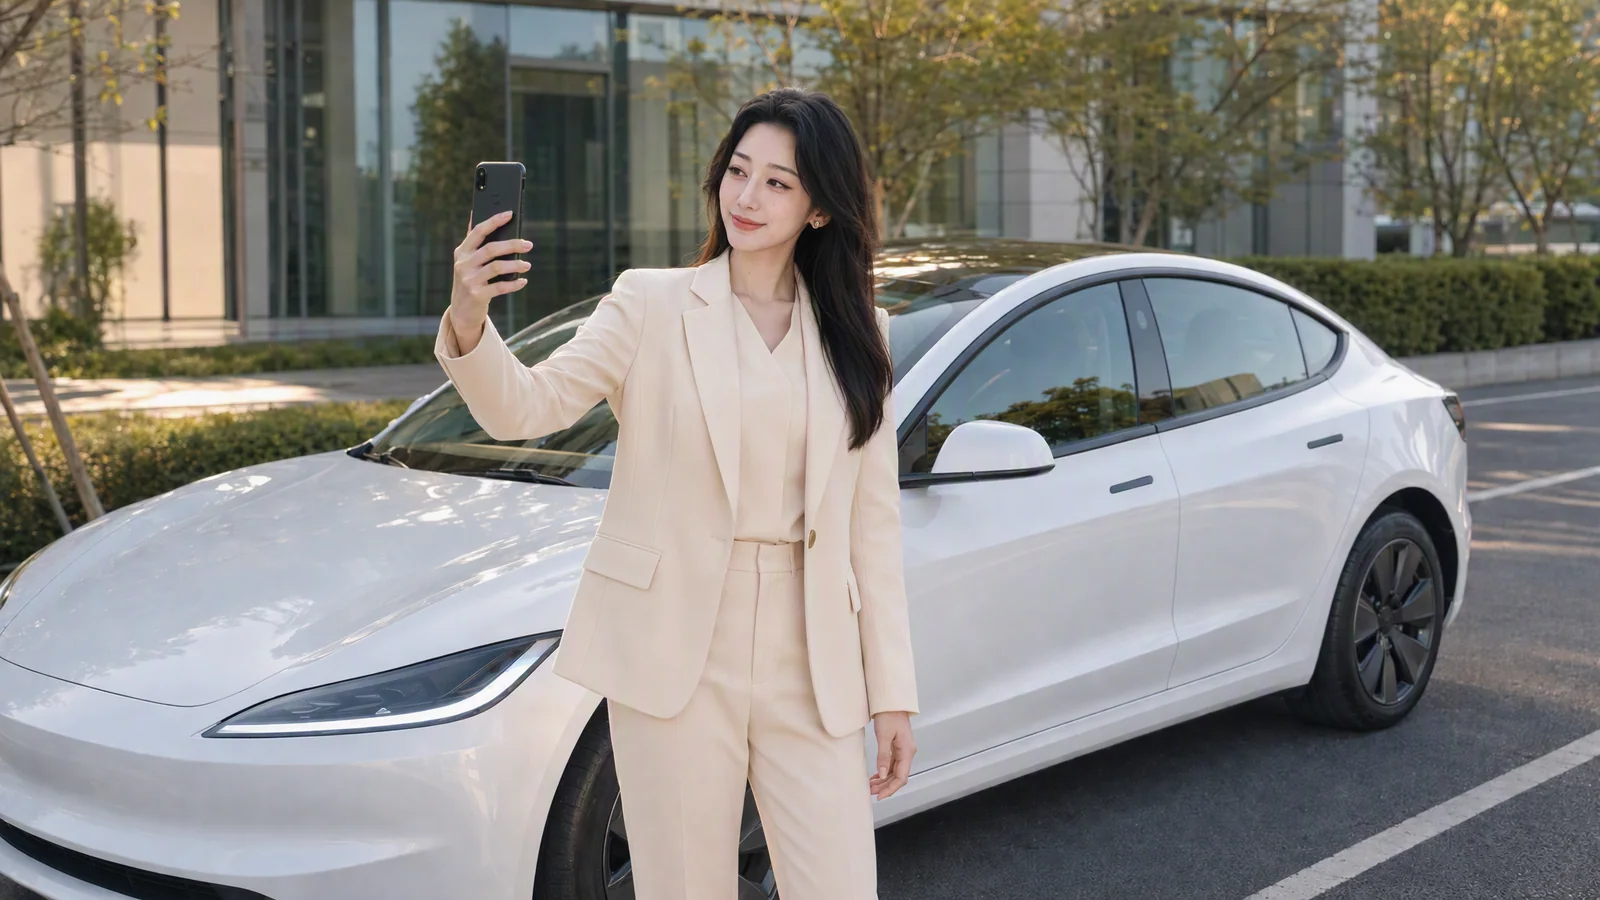
职场新人站在第一辆车旁微笑自拍留念的1-02静帧

买车,是努力换来的自由

终于有了自己的第一辆车。
她以为,从此就能自由出发。

停车,却处处充满未知

但公司停车的种种麻烦,
让这份期待一次次被打断。

01 · 构思 / 四个体验触点

从她的经历里,找到四个具体的“不知道”。

排队名次和预计等待区间的Film演示截图
01 · 等待什么时候能在公司停车?知道排到哪,还要等多久
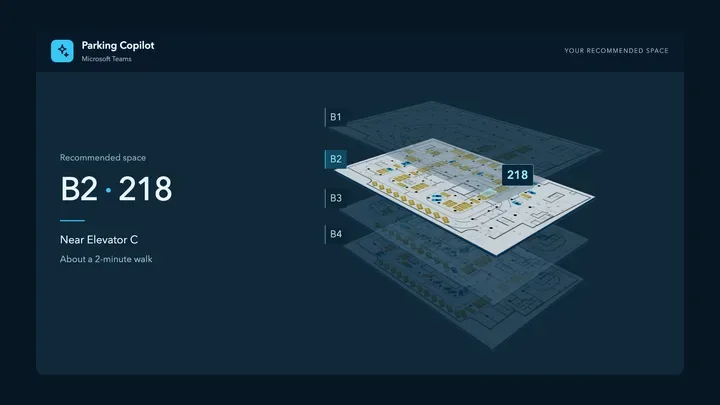
Film车位推荐与楼层关系截图
02 · 停车进了车库,该停在哪里?找到具体车位和路线
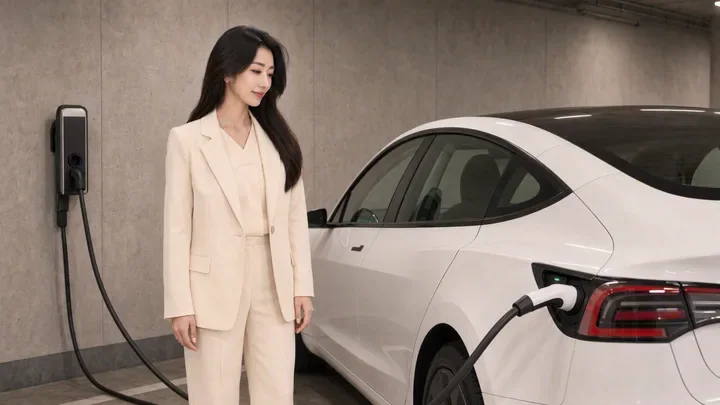
Film充电环节中的人物与车辆
03 · 充电充电位满了,怎么办?协调已充满的车位
Film找到车环节的白车画面
04 · 找车下班了,我的车在哪里?记住停车位置,带她找到车

停车不应该是一连串未知。
AI 应该在人真正需要答案的那一刻出现。

01 · 构思 / 人物的情绪变化

从梦想成真,到重获自由。

1-02车边纪念照
期待 · 终于拥有第一辆车
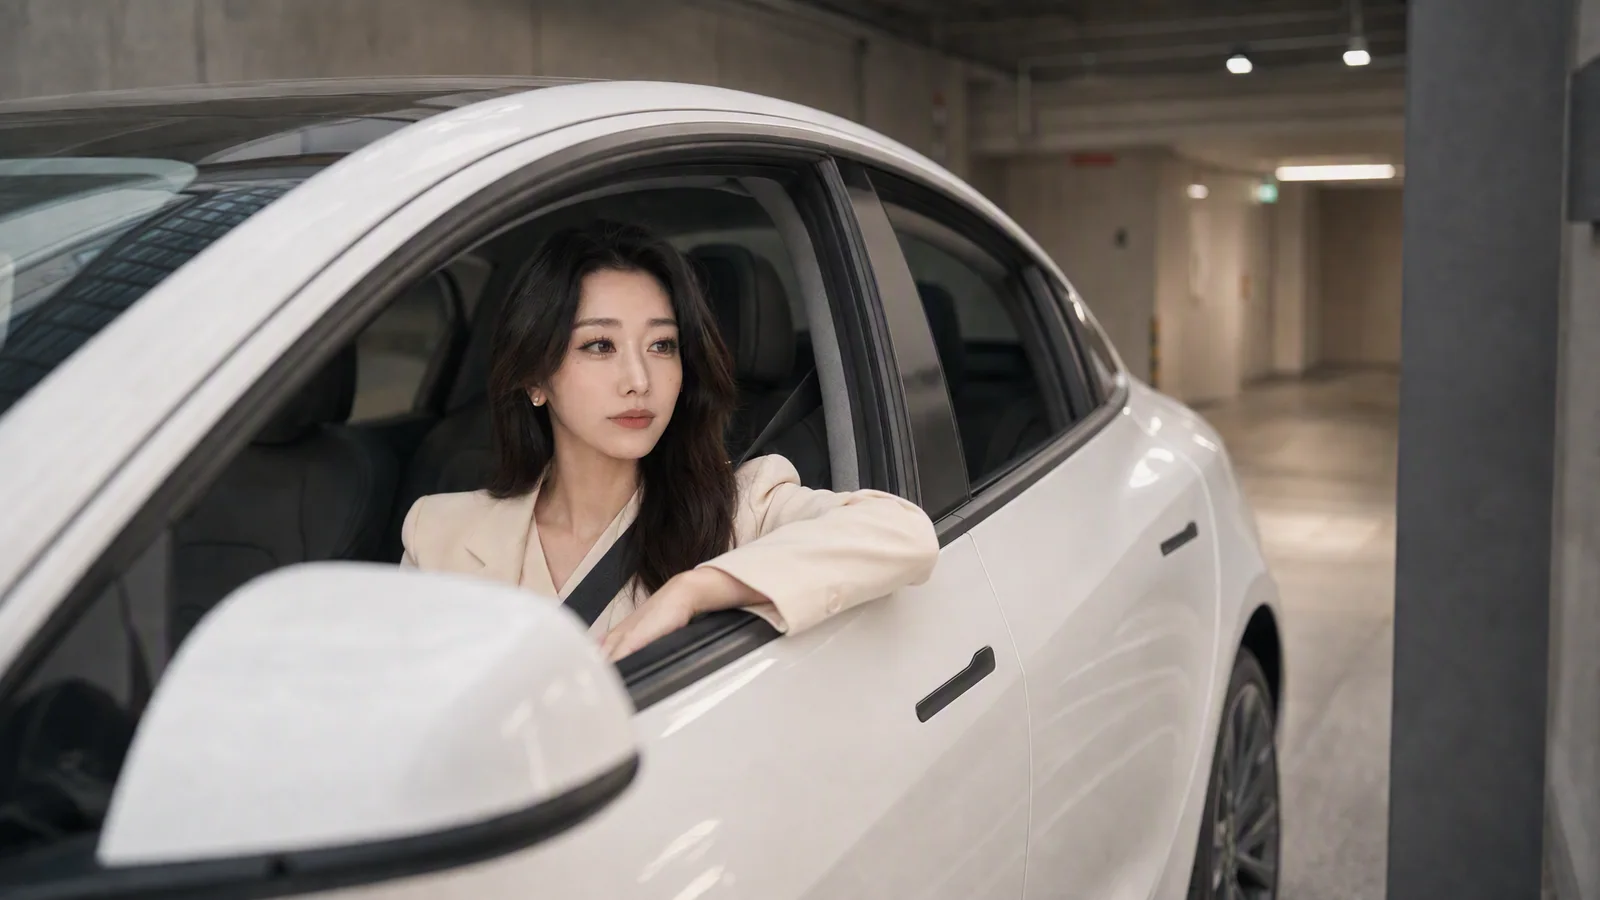
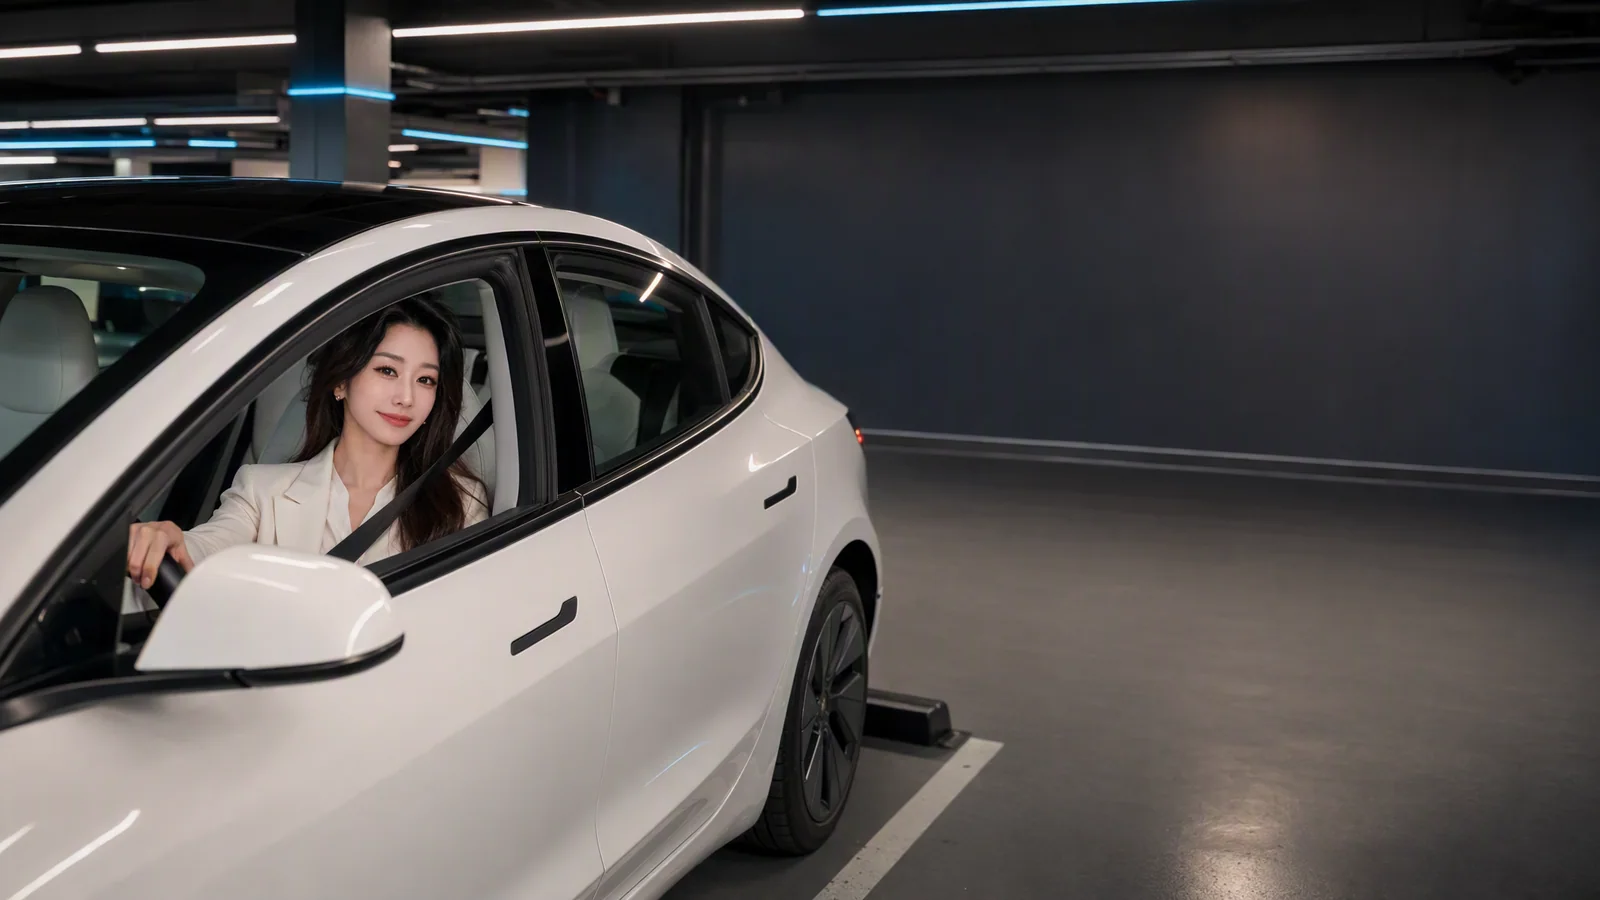
4-02车库中犹豫的人物反应
不确定 · 到了车库,还是不知道
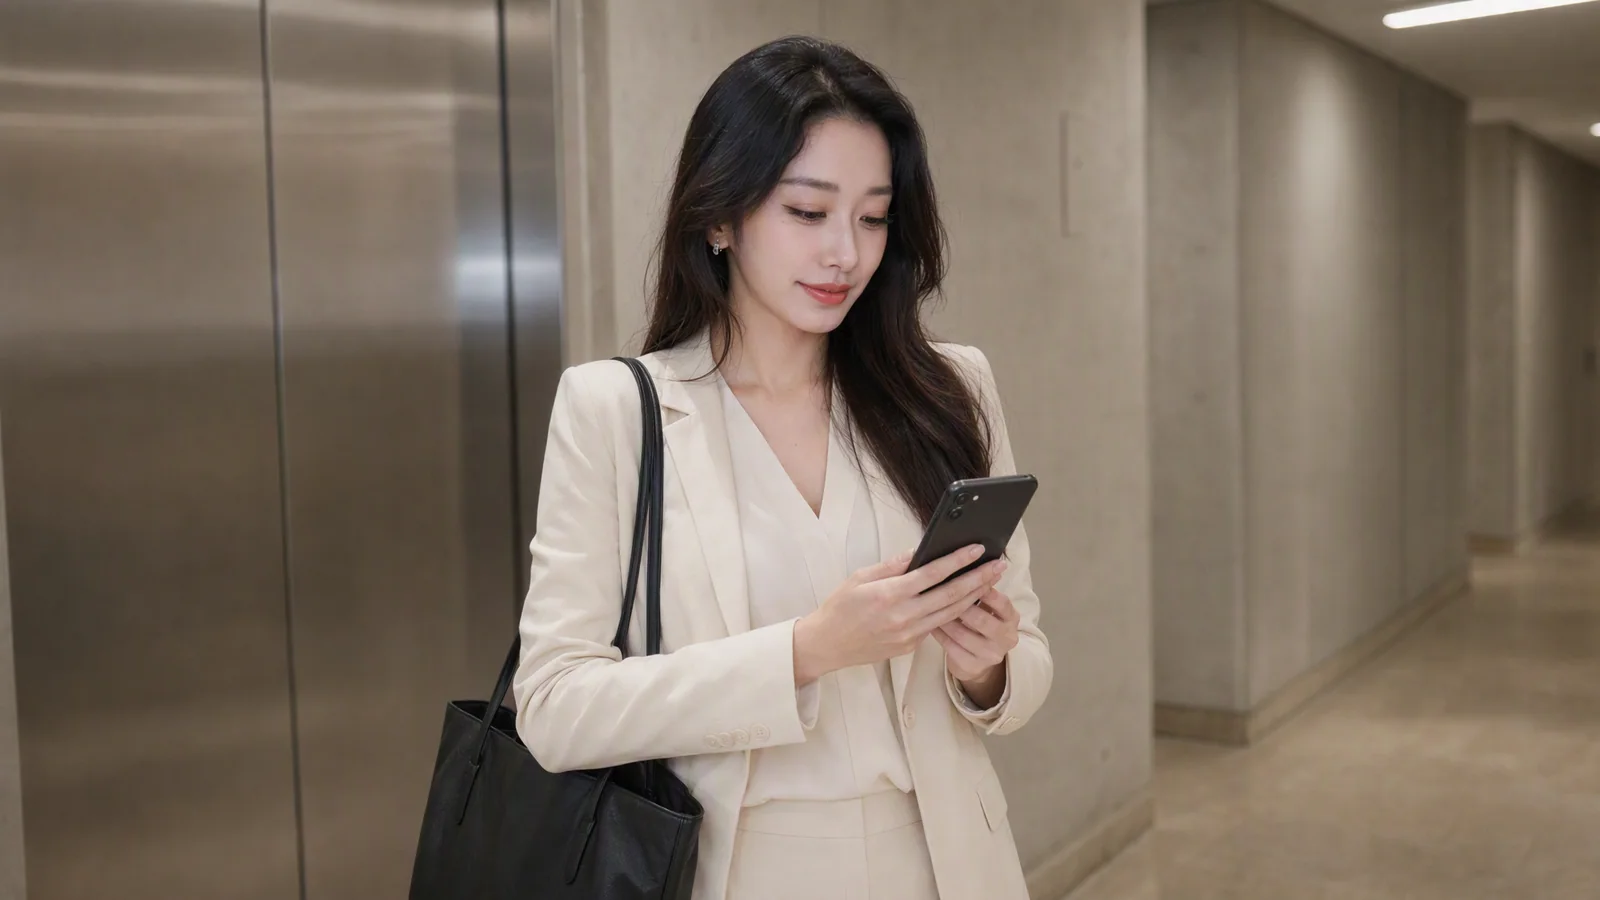
6-05b拿起手机的人物动作
信任 · 再遇到问题,她知道可以问谁
  1. 梦想成真
  2. 遭遇不确定
  3. 得到安心
  4. 建立信任
  5. 重获自由

“One less worry. A little more freedom.”

02 · 剧本与分镜 / 从构思到文字

先把故事写下来,再决定怎么拍。

第一场 · 人生第一辆车

早期中文剧本摘录
画面
工牌和新车钥匙卡放在一起。
她在车旁拍下一张并不张扬的纪念照。
旁白
“那一刻,她以为自己终于拥有了自由。”
声音
安全带扣合声、电车启动提示音。
转场
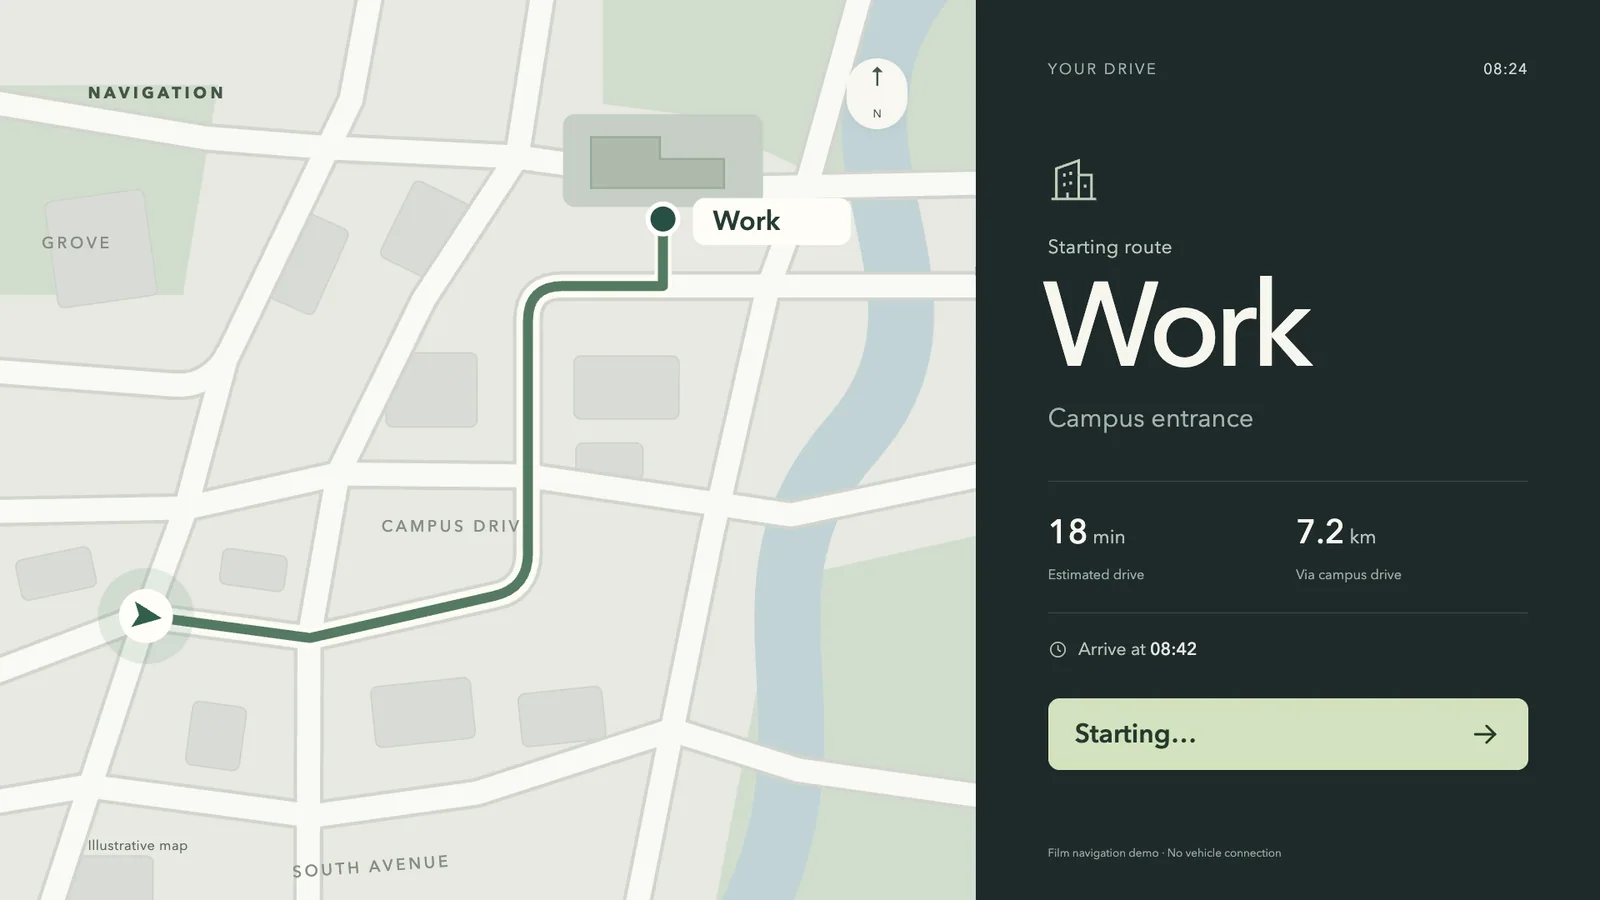
她在导航里点击“公司”。画面从目的地卡片切到公司停车申请页面。

写清楚看见什么、听见什么,以及怎样进入下一场。

02 · 剧本与分镜 / 七幕故事

把四个触点,串成一段完整旅程。

第一幕车边纪念照选用静帧

01Lexie 的第一辆车

建立对自由的期待

第二幕排队名次与预计等待区间的Film截图

02等待有了答案

让她对等待心里有数

三个月后

03权限获批

从等待转入车库体验

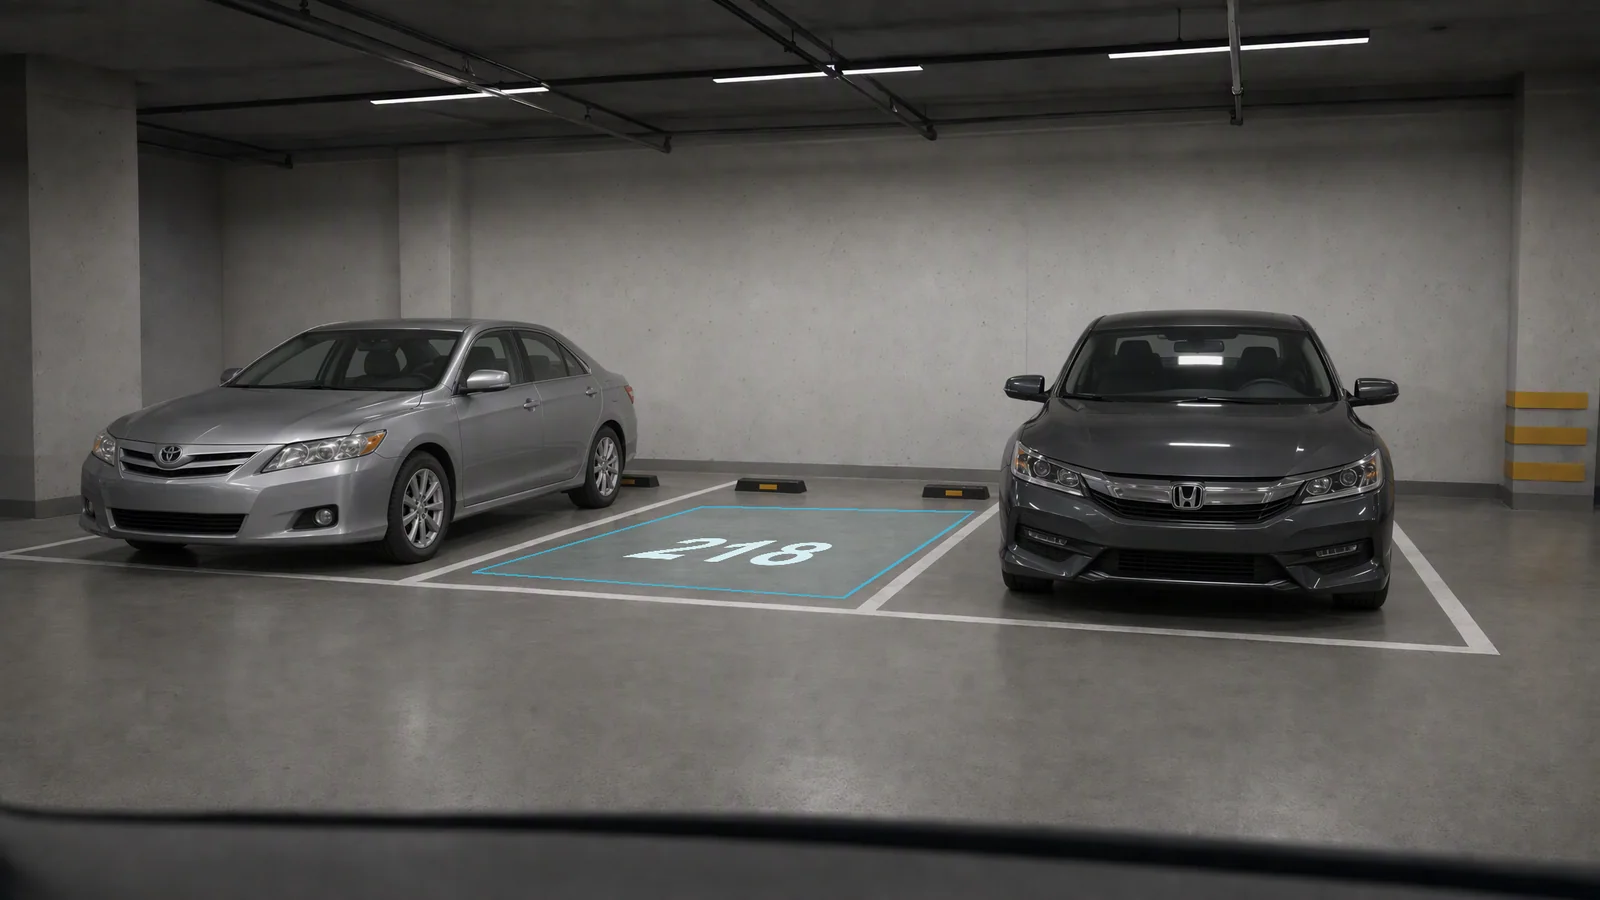
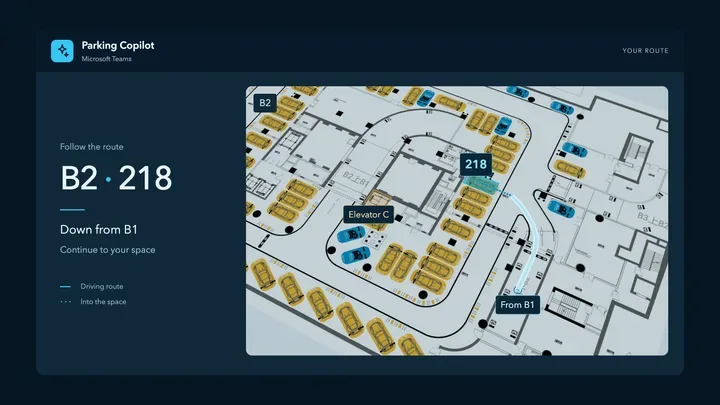
第四幕选用图:目标车位218

04找到车位

把答案变成可走的路线

第五幕Film画面:车辆开始充电

05协调充电

遇到新难题,仍有下一步

第六幕Film找到车的结果画面

06下班找车

让一次次帮助积累成信任

后期四服务回顾生产片段末帧

07回到自由

回应开场对自由的期待

02 · 剧本与分镜 / 导演分镜预演

把文字里的故事,先变成看得见的画面。

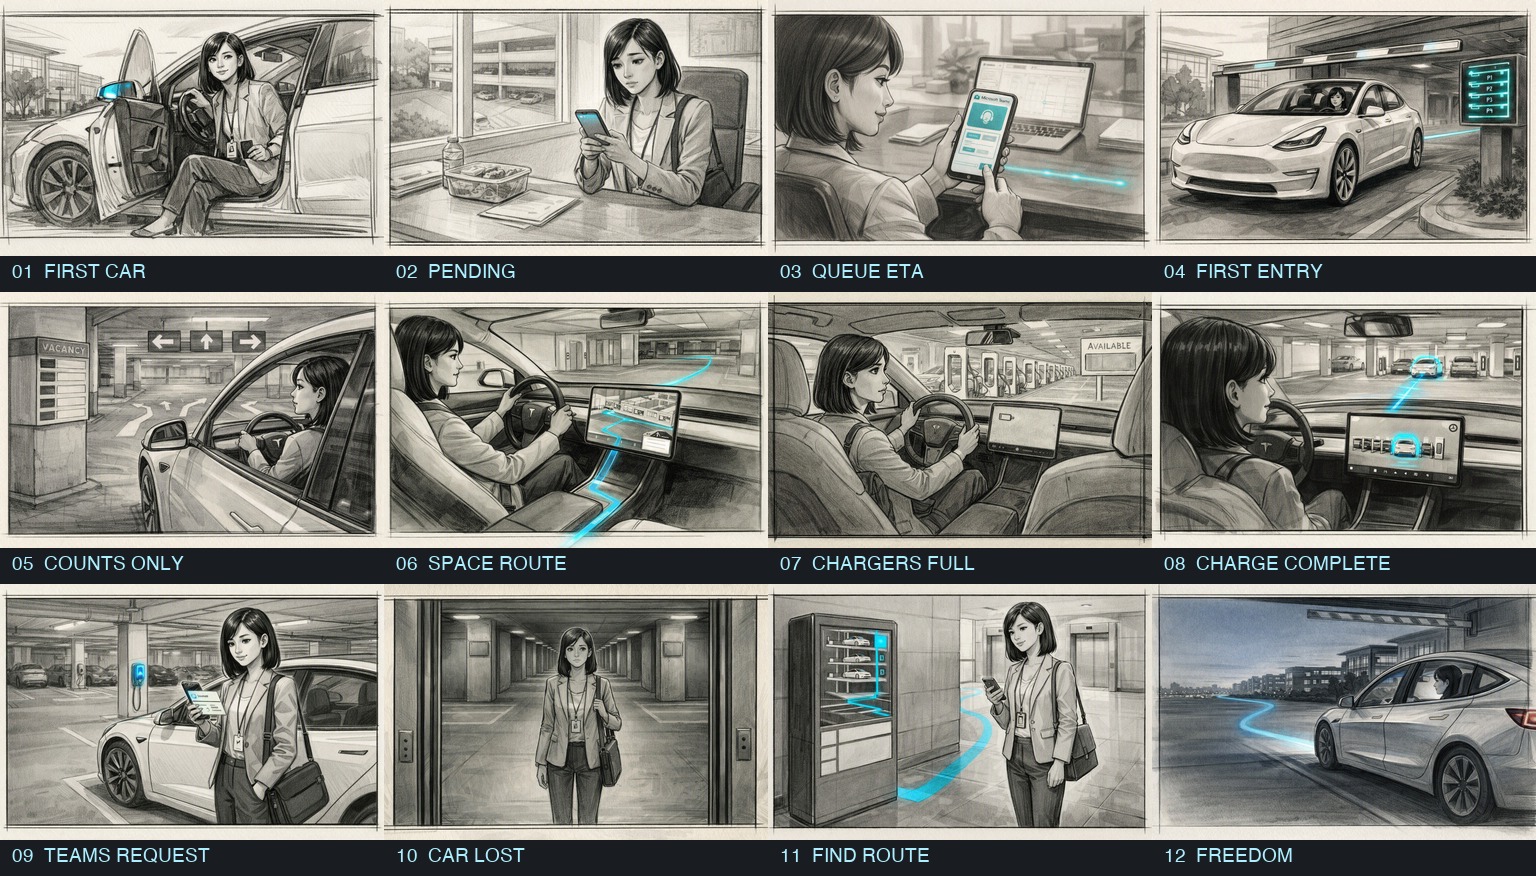
早期导演分镜的十二帧总览:第一辆车、等待与排队答案、驶入车库、空位数字与具体路线、充电协调、找车与自由抵达
早期分镜草案 · 12 个关键画面,预演人物处境、构图与 AI 的出场时机。
02 · 剧本与分镜 / 镜头的职责

每个镜头,先讲清一件事。

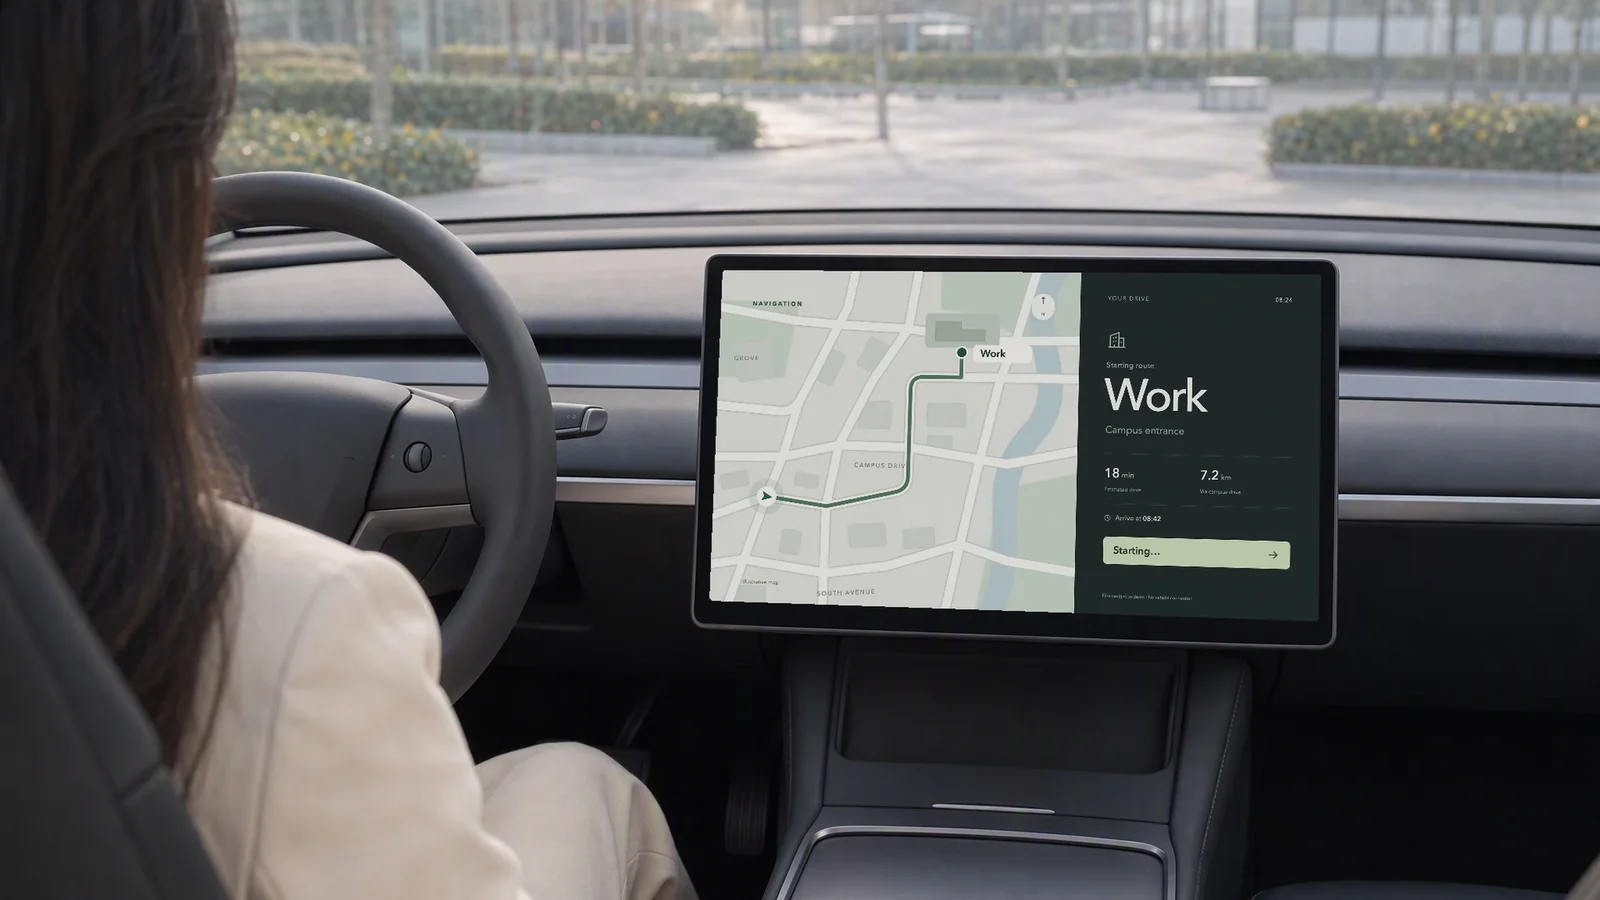
1-05 Work车内合成
1-05去公司
交代目的地,推动故事出发
4-10中央空车位218
4-10停这里
明确目标,让观众知道该停哪
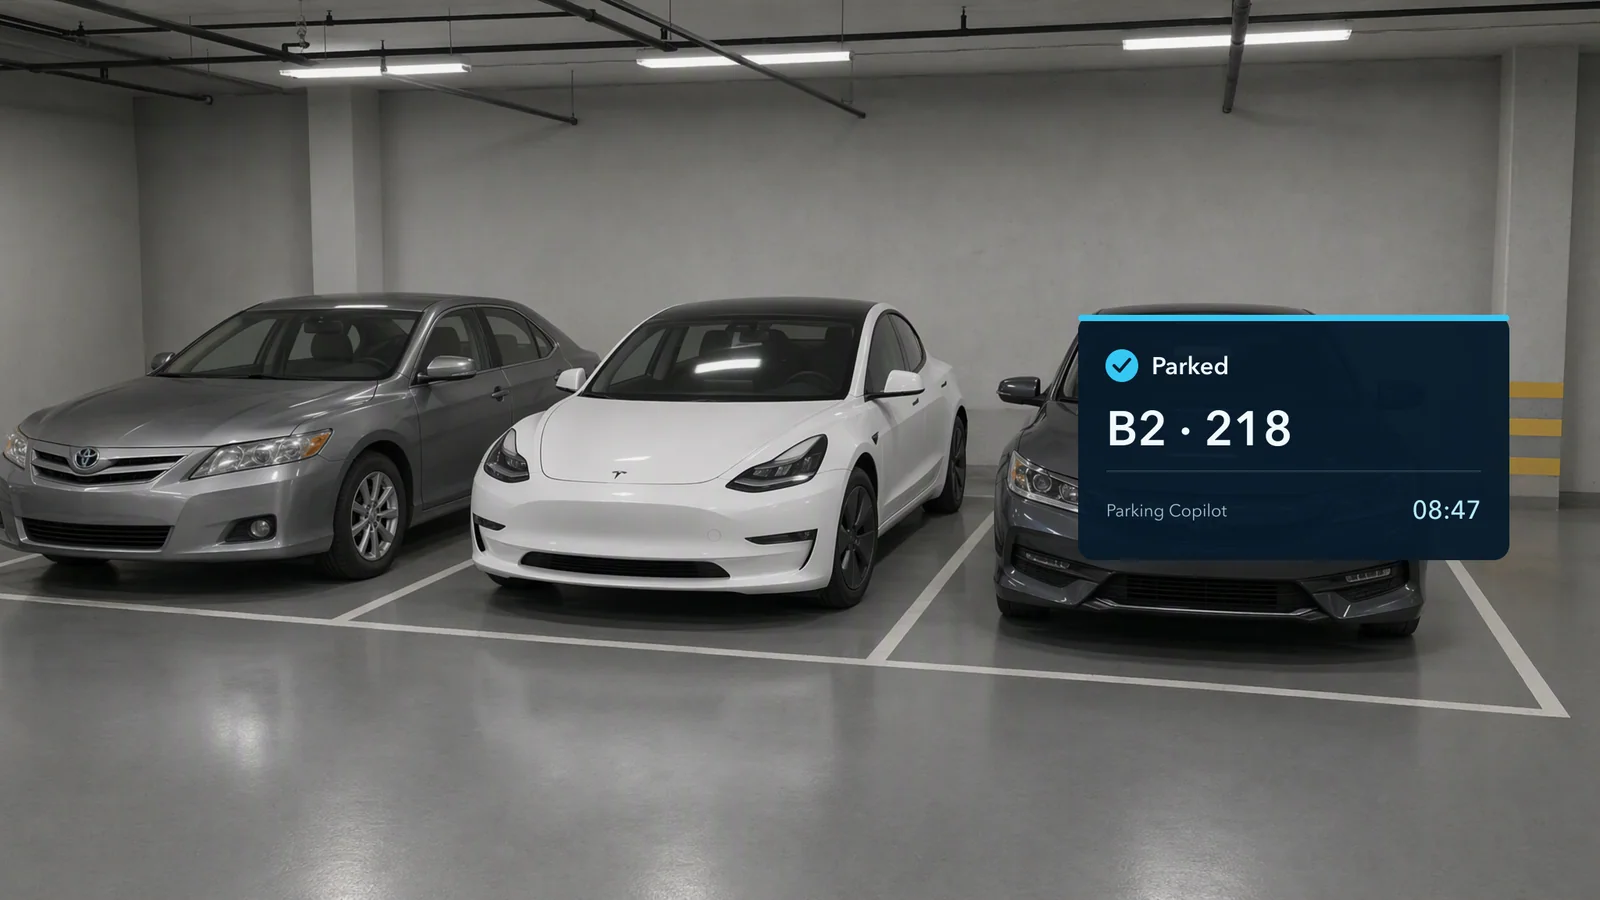
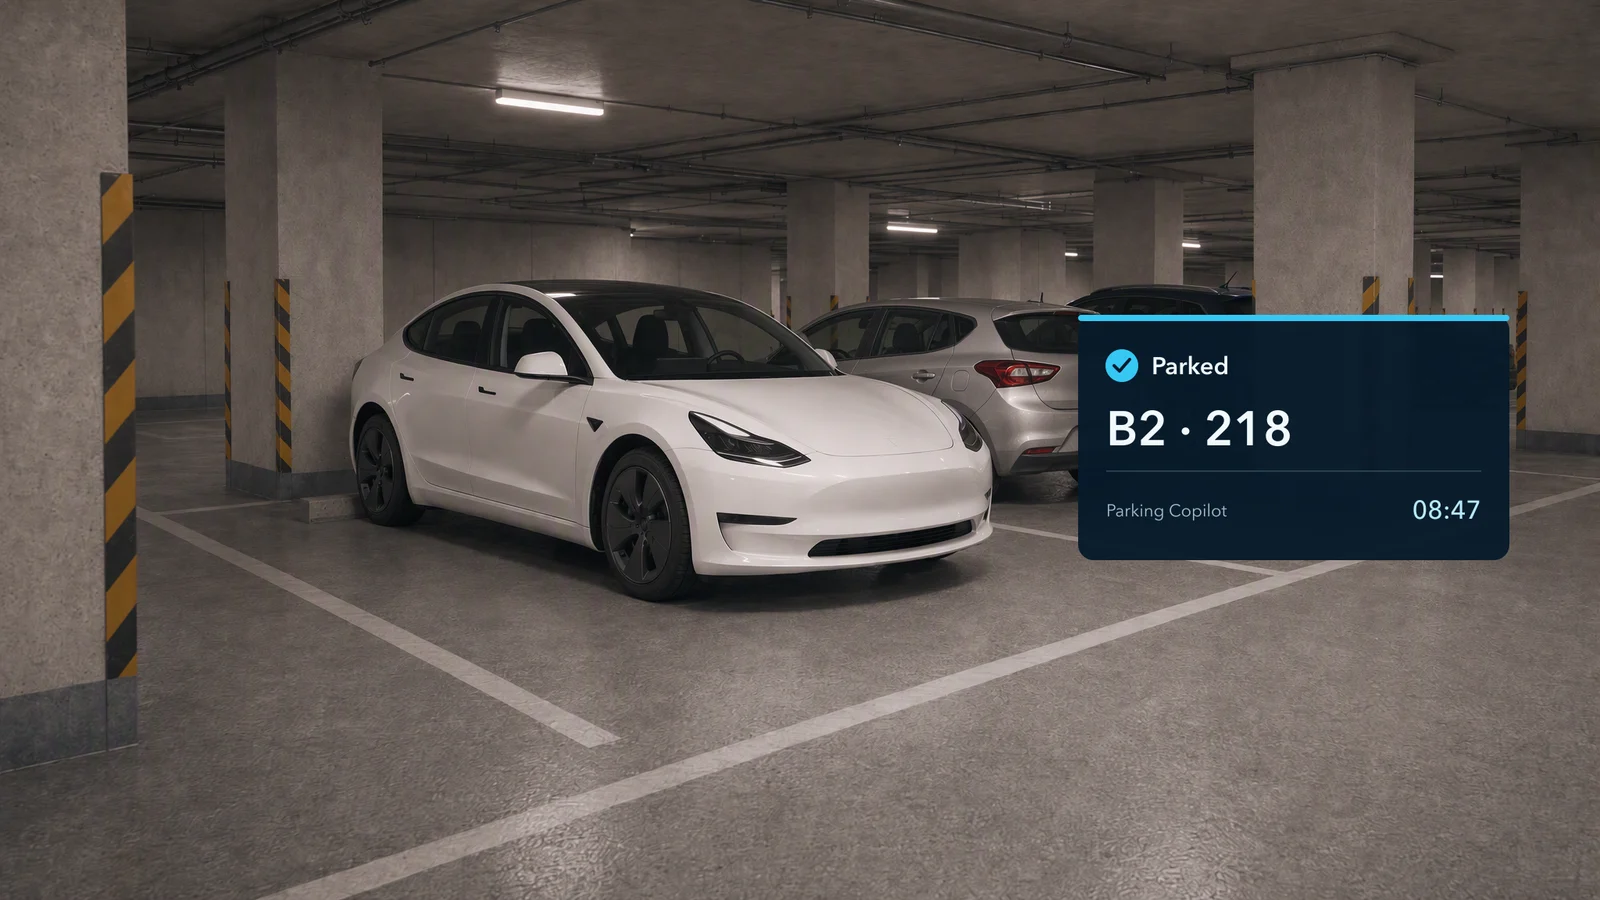
4-11白车已停妥与Parked卡
4-11停好了
确认结果,让这一段体验收住

分镜不是给画面编号,而是决定:这一刻要让观众知道什么。

02 · 剧本与分镜 / 第一幕试制

先用六个镜头,做出故事的开场。

5 张静帧+1 段合成视频
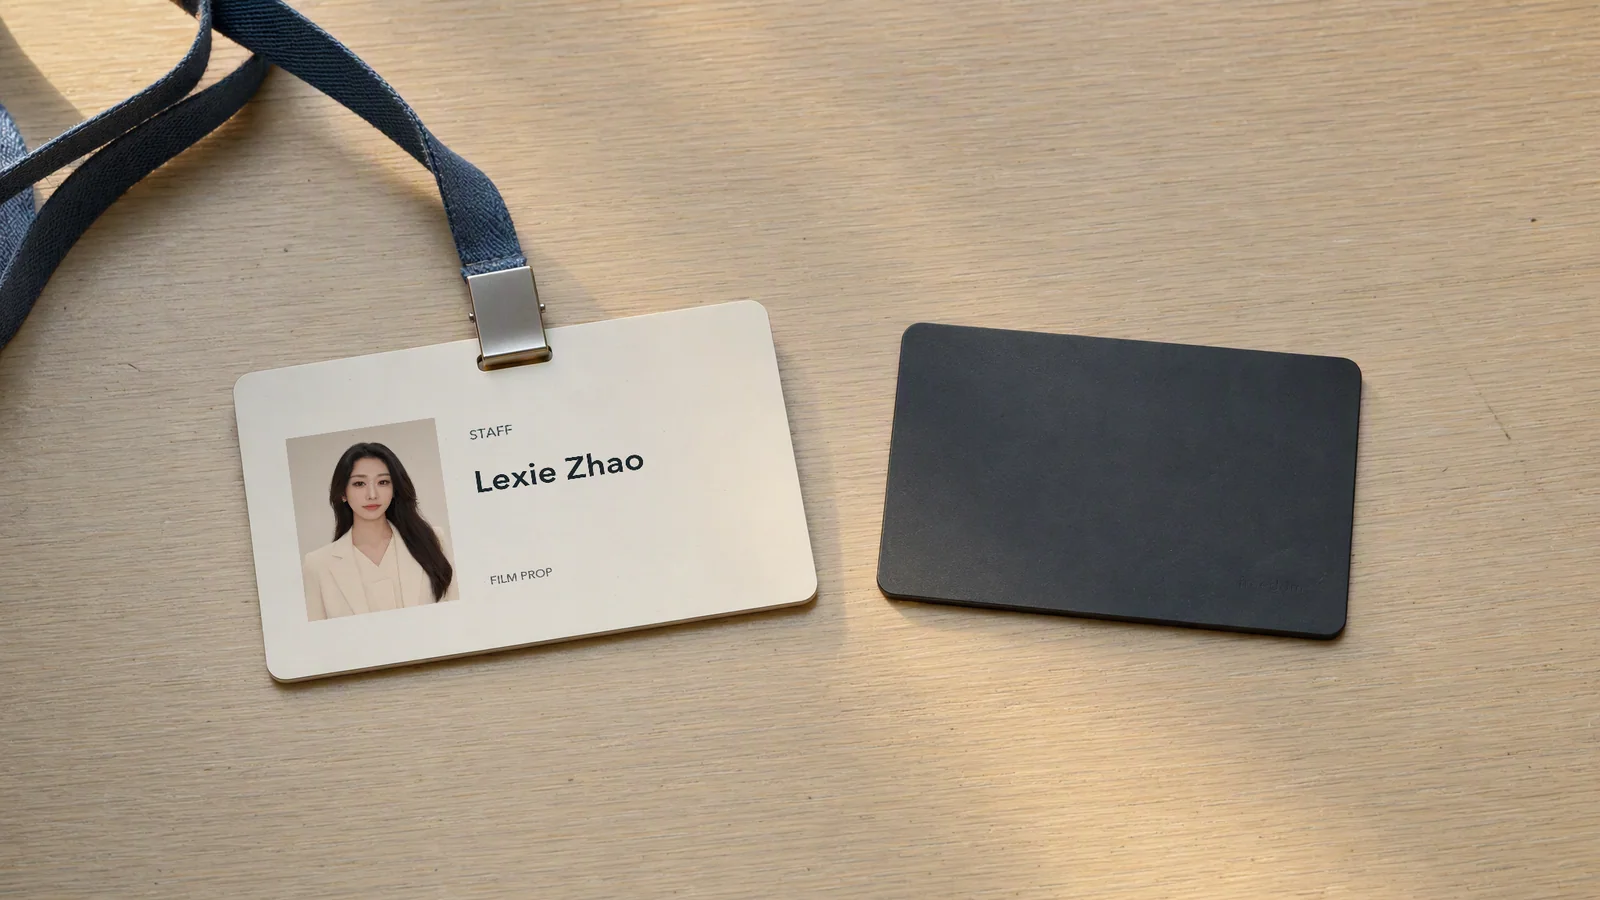
1-01影片道具工牌与钥匙
1-01工牌与钥匙
1-02车边自拍
1-02车边纪念照
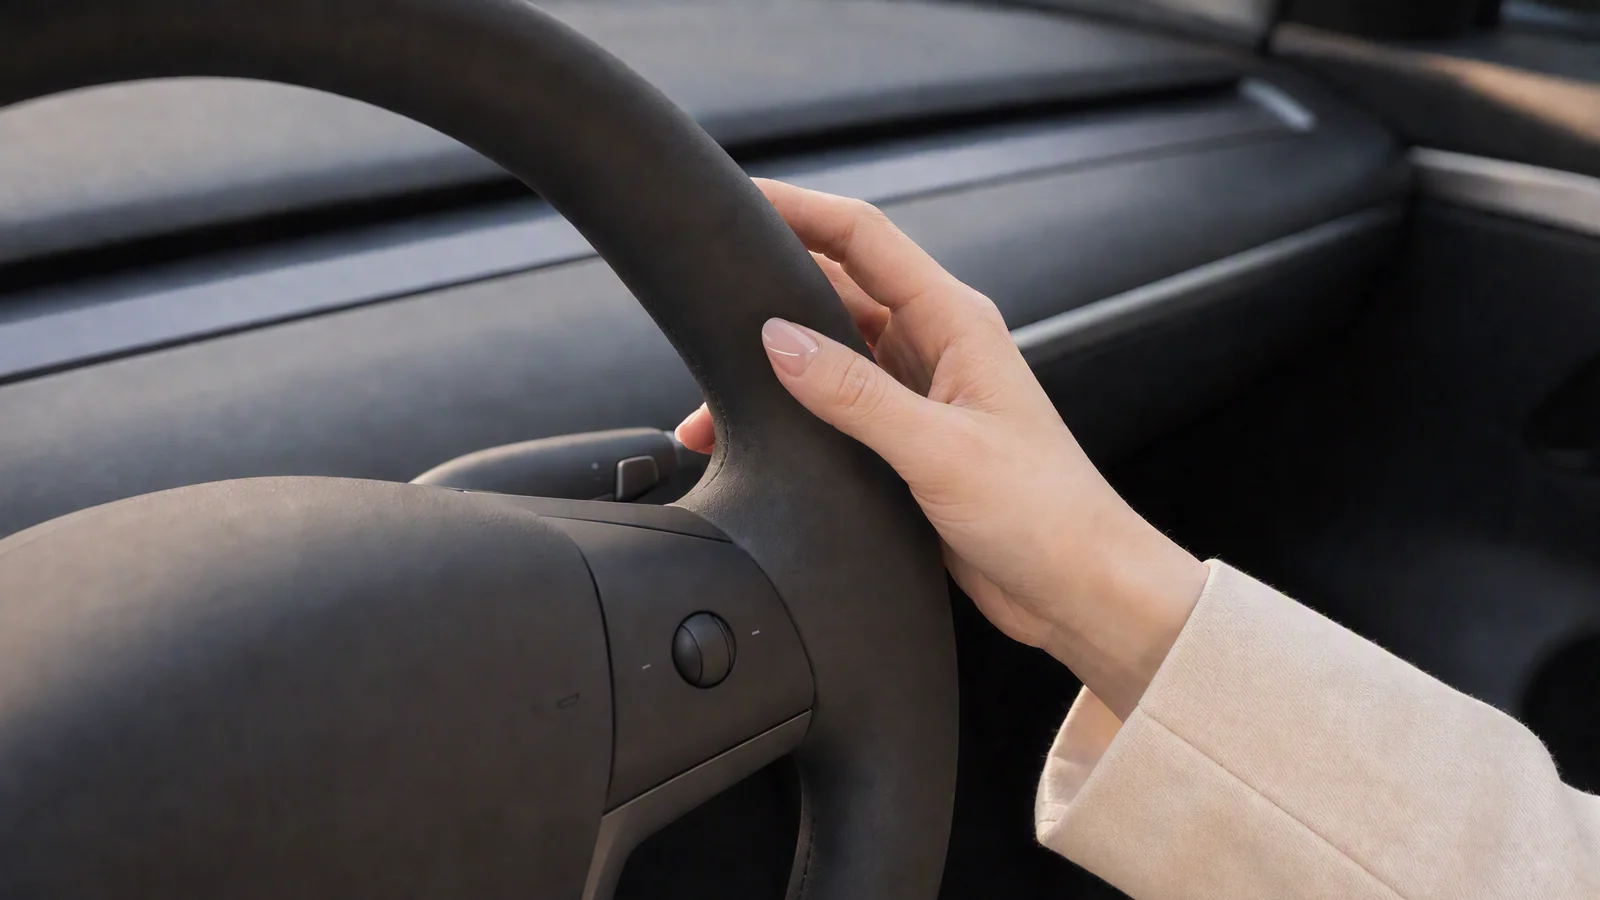
1-03手触方向盘
1-03触碰方向盘
1-04驾驶位侧脸
1-04准备出发
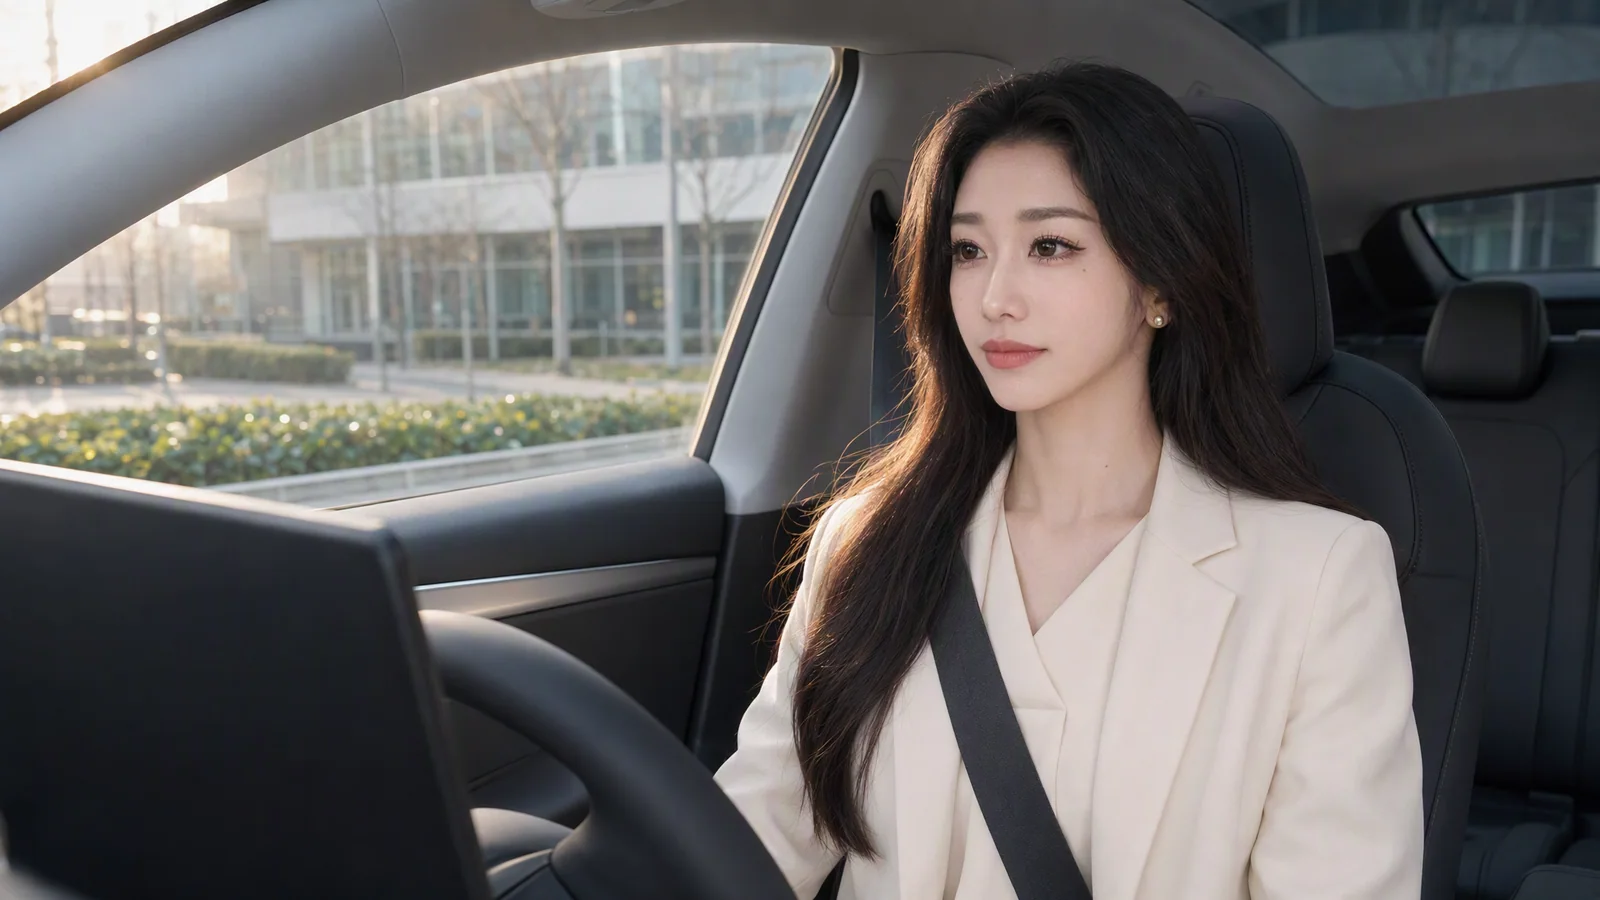
1-05车内导航解码帧
1-05开启导航
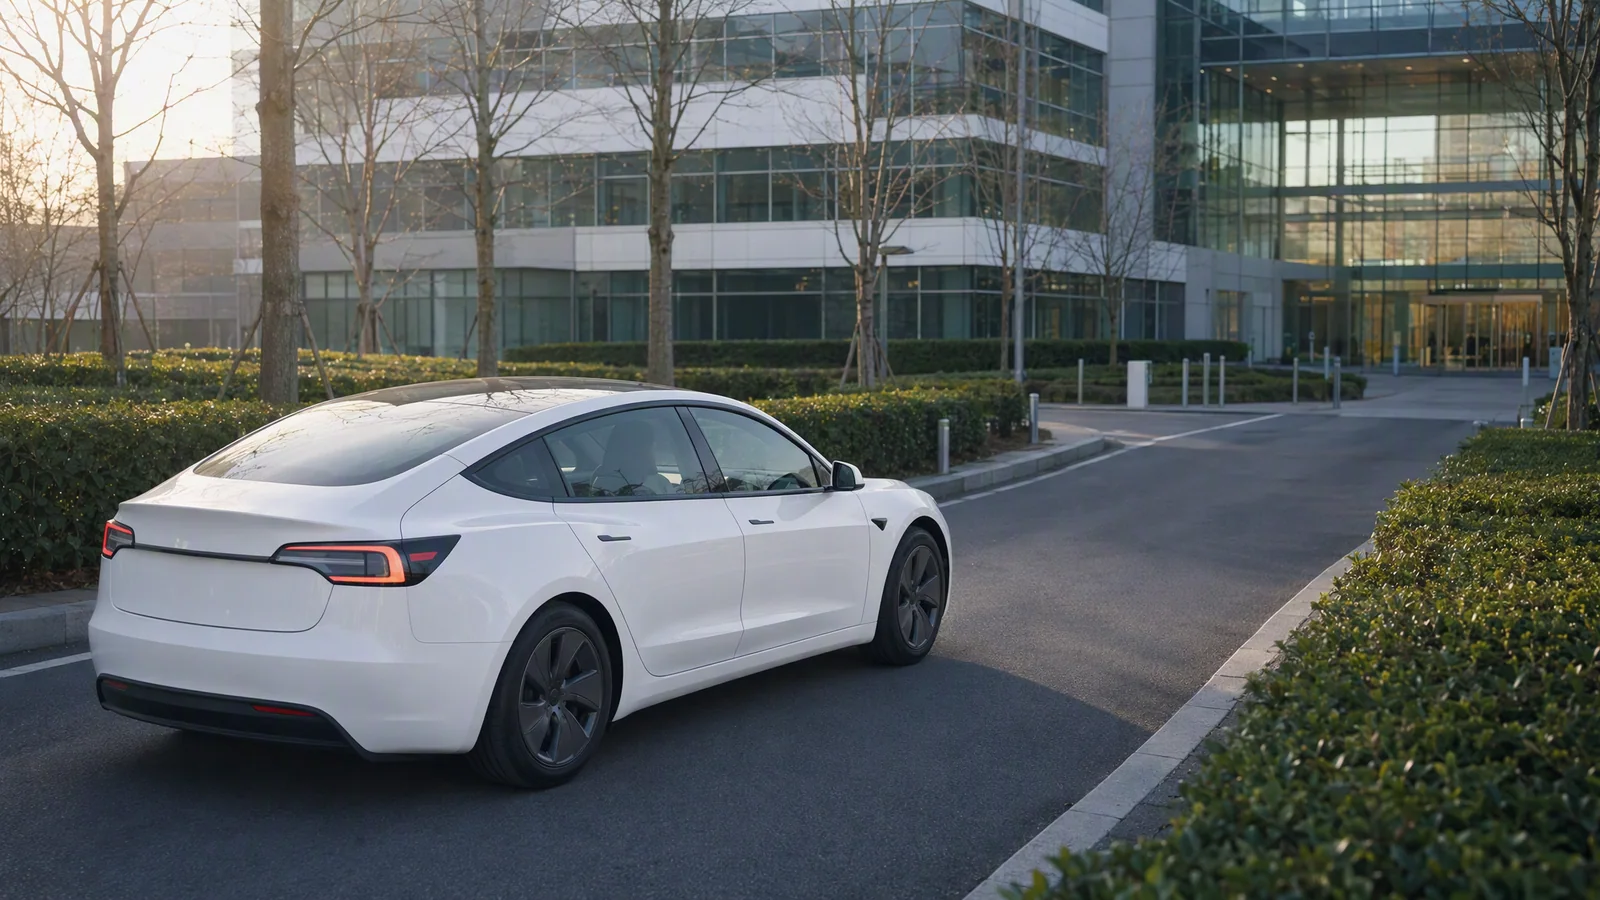
1-06白车驶向办公楼
1-06驶向公司
03 · 制作 / 选择制作路线

不同的画面,交给不同的工具。

生成的人物与车内环境静帧
AI 生成静帧gpt-image-2生成人物、光线与环境
代码制作的Work导航界面
代码制作界面React + TypeScript精确控制文字、数字与交互
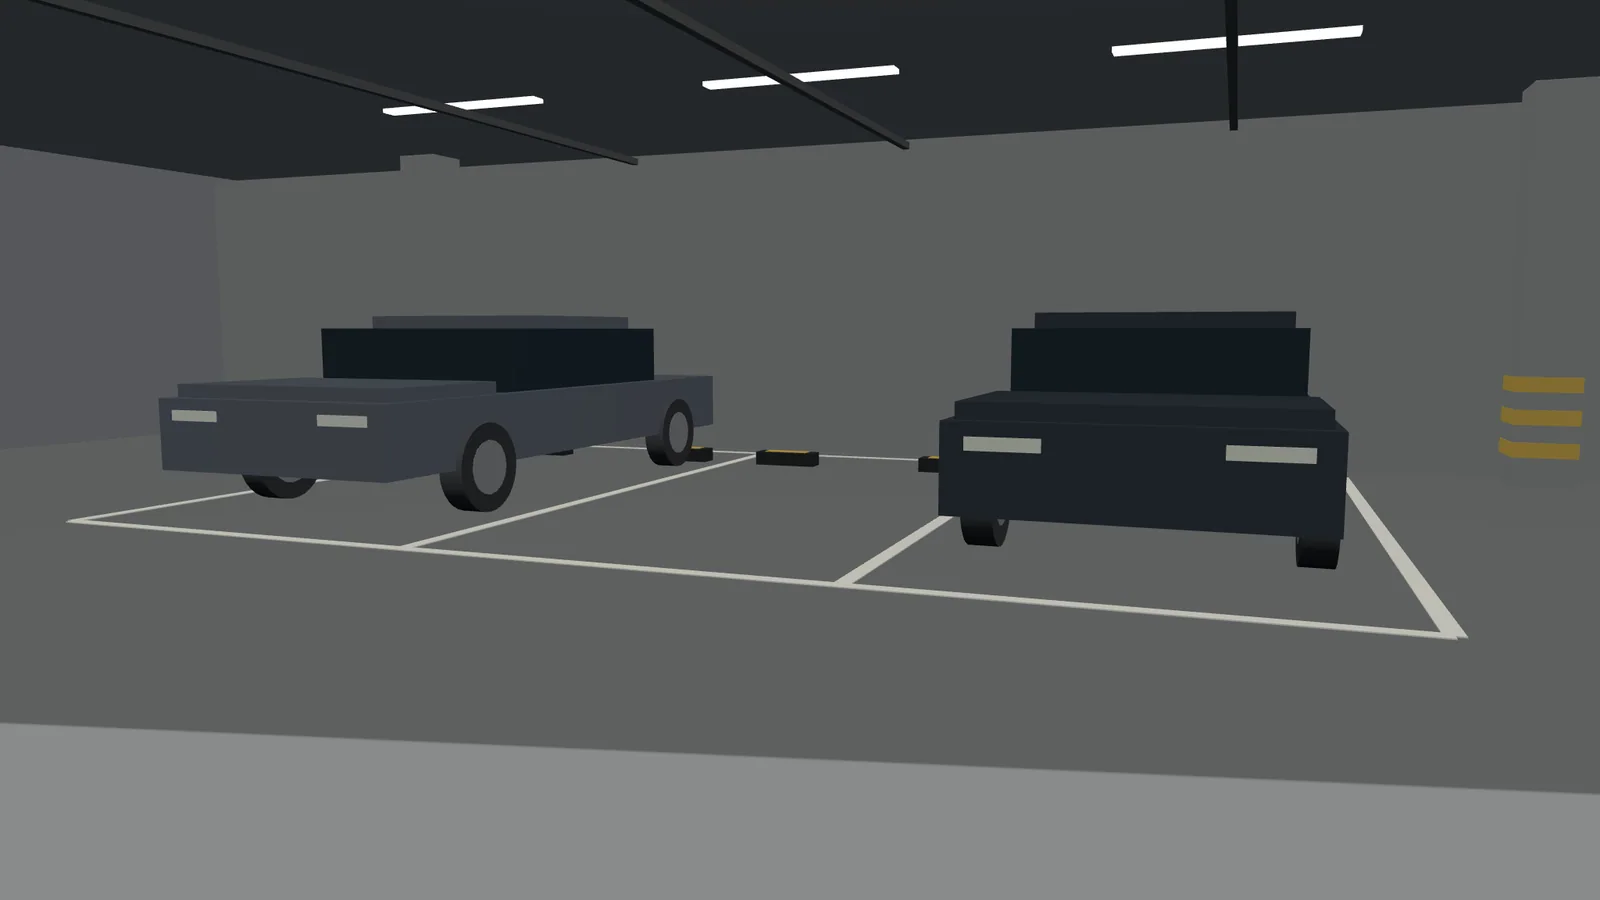
Three.js搭建的三格车位空间参考
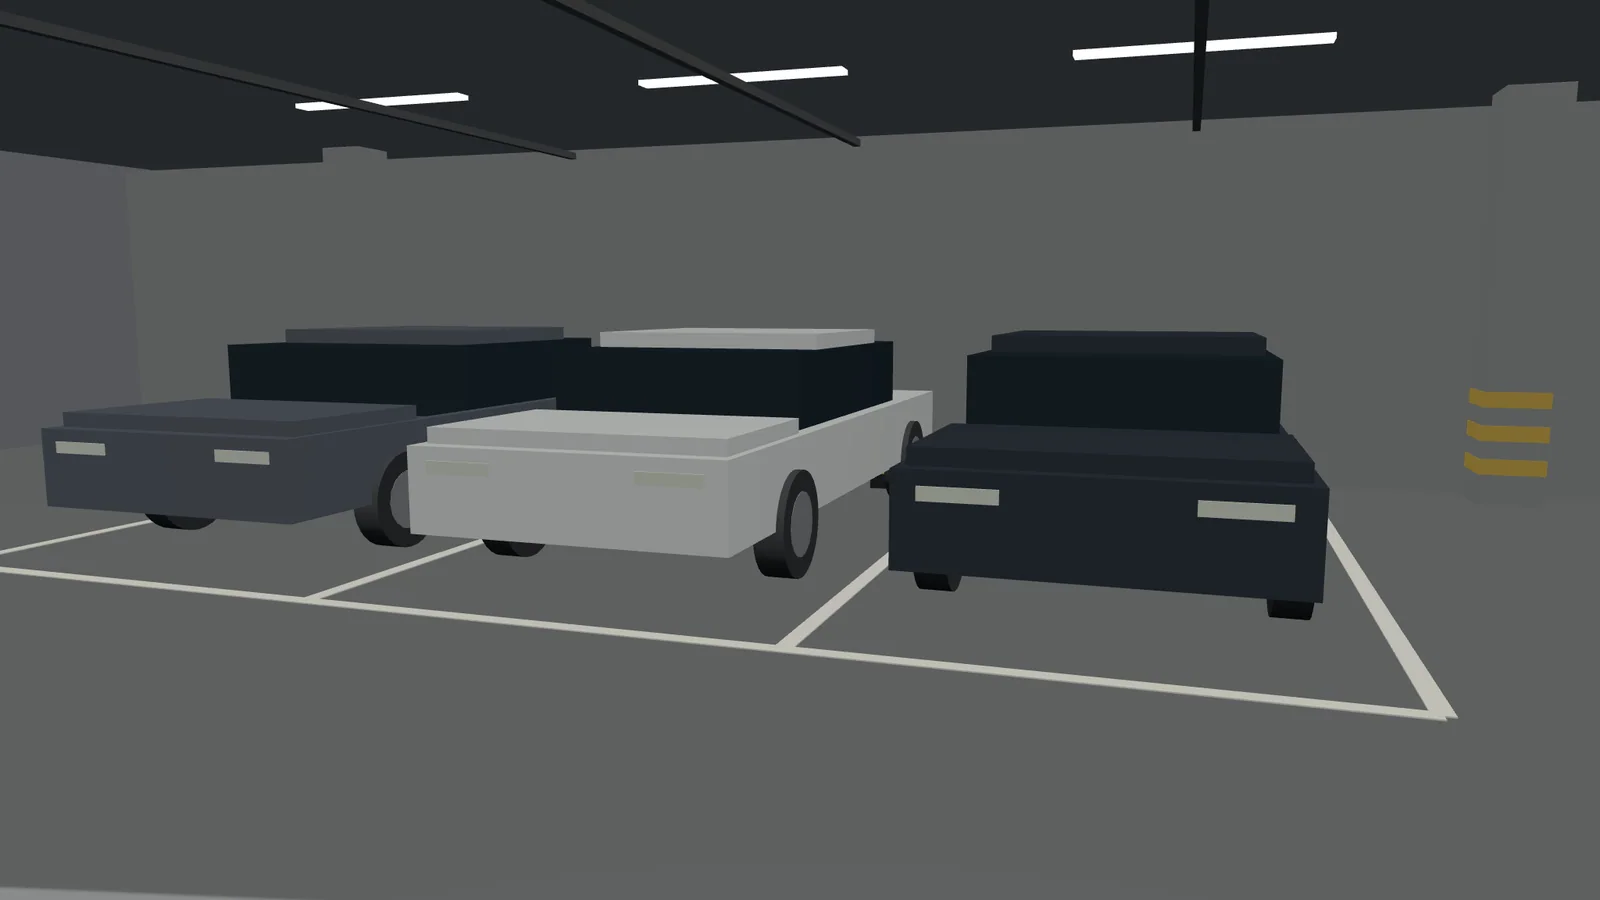
三维搭建参考Three.js先确定车位、车辆与机位关系空间参考,不直接入片

先按画面需求分工,再通过合成与剪映完成短片。

03 · 制作 / 人物一致性

先确定她的样子,再让她进入镜头。

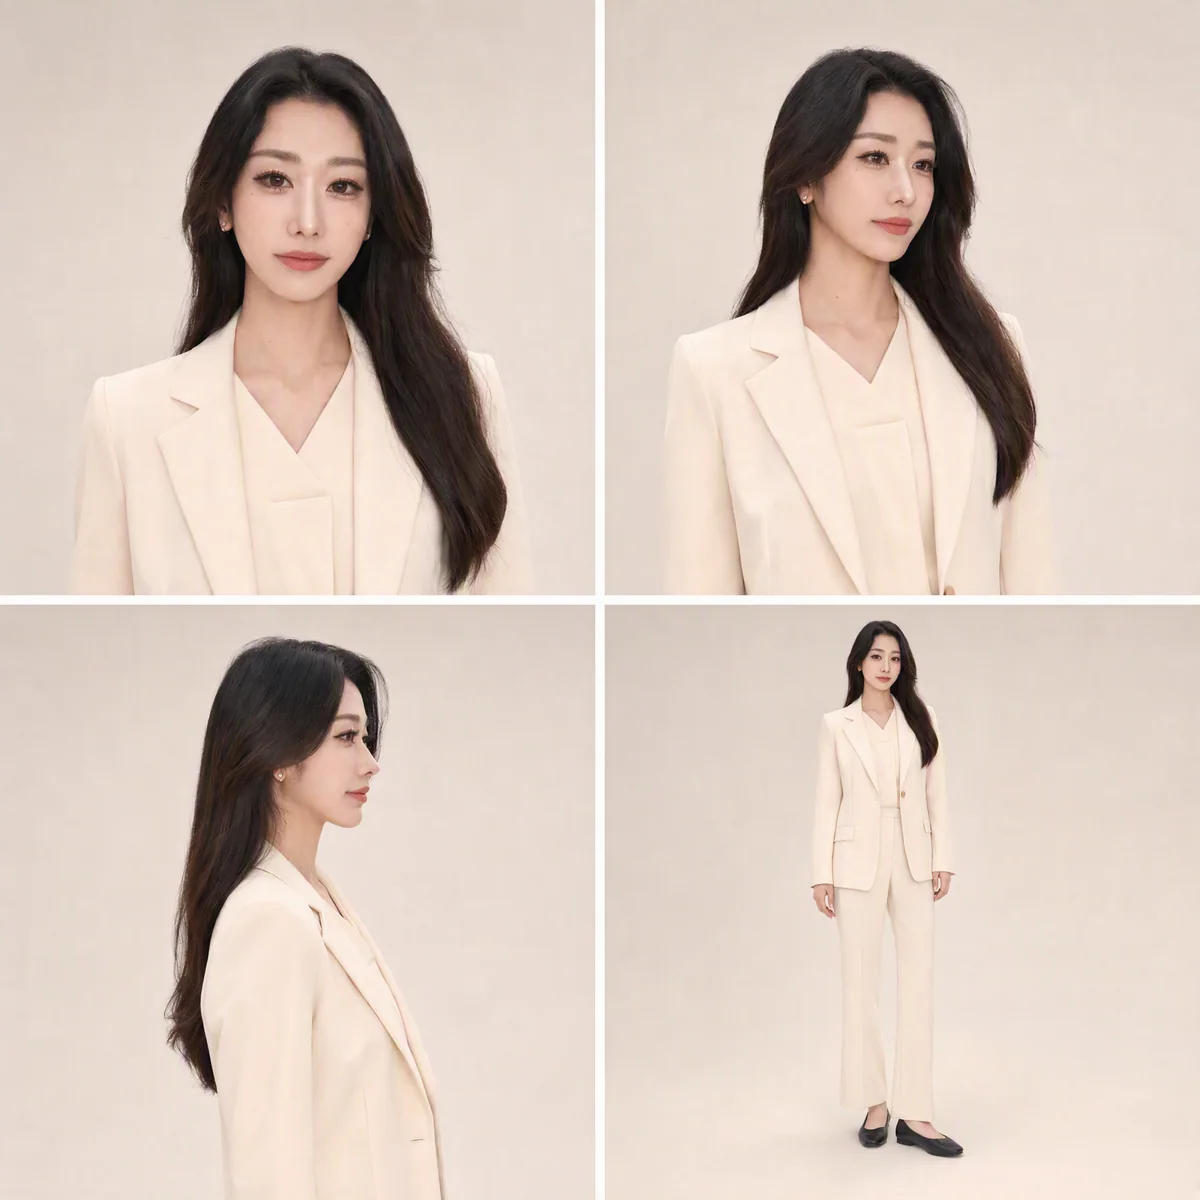
AI生成的Lexie四格角色参考图v2:统一的米白上装与长裤
AI 生成的角色参考图 v2
1-02镜头图v3,米白衣装,视线与手部透视待修订;与下一页输入为同一张图
1-02 · 车边纪念照 待修订

保持一致:脸型、发型、服装与比例。
随镜头变化:场景、机位、动作与表情。

有了镜头图,再把视线与手部姿态修到自然。

03 · 制作 / 镜头图修订

有了画面,再把细节修到自然。

1-02 · 车边纪念照
后续姿态修订 · v3 → v4
修订前的车边自拍图:人物看向主镜头,举手机的手部透视偏大
修订前视线偏离手机,手部透视偏大
修订后的车边自拍图:人物看向自己的手机,手部比例与自拍姿态更自然
修订后看向手机,自拍姿态更自然
03 · 制作 / 界面与 Demo

Demo 不只用来体验,也用来制作镜头。

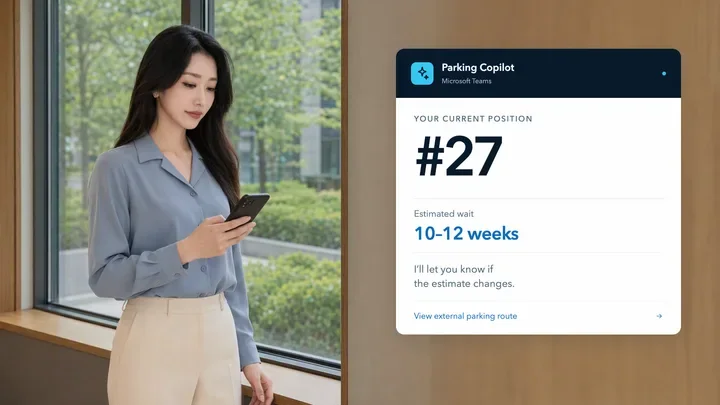
Film排队页面:人物与排名27、等待区间卡片
排队界面示例 · 演示数据

界面内容可控

停车排队名次、等待区间与文案
由代码控制,按剧本呈现需要的信息。

镜头节奏可控

在 Film 制作页控制状态与时序,
反复回看,再采样成视频素材。

03 · 制作 / 界面合成

把网页界面,合成进车机屏幕。

1-05 · 车内导航
1.5秒合成片段
1-05浏览器Work界面原片解码帧24
① 制作界面视频让网页按固定时序运行,逐帧采样。
相同帧UI映射到汽车中控屏的合成结果
② 合成进车内画面按中控屏的透视调整界面,保留车内底图。

前1秒展示通勤目的地,后0.5秒切入导航。

03 · 制作 / 空间与路线

先看清车位在哪,再看清怎么过去。

4-06 · 车位定位
4-07 · 路线展示
4-06车位定位:从四层车库聚焦B2层的218号车位
① 定位车位从四层总览,聚焦 B2 层的 218 号车位。
4-07路线展示:B2层前往218号车位的路线
② 展开路线只保留 B2 层,逐步显示前往目标车位的路线。

用代码控制楼层聚焦与路线显现,让空间信息跟着镜头节奏展开。

04 · 剪辑 / 素材交付

每幕一份素材包,配一份剪映操作指南。

每幕素材包

├─ 画面与声音 ├─ 分层与参考(按需) ├─ ├─ 素材清单与核验记录 └─ 历史备份(不导入)

点击指南,预览第一幕示例
镜序、时长、图层、效果与声音落点

首次导入 · 搭起时间线

按指南选择素材,接入统一工程。
按镜序、时长和图层关系装配。
回放检查,再逐步精修。

后续更新 · 修改已有工程

先备份,只处理受影响的镜头。
单镜替换后核对时长、效果和音字。
拆镜或改时长,按更新说明调整。

素材按幕交付,剪辑在同一工程里持续推进。

04 · 剪辑 / 装配顺序

先把节奏排顺,再打磨画面与声音。

  1. 01

    排顺节奏

    按镜序与时长排好素材。

    带上临时旁白,
    检查叙述节奏。

  2. 02

    打磨画面

    加入轻推、图层运动
    与必要转场。

    保持人物、文字和界面清晰。

  3. 03

    完善声音

    分轨调整旁白、音效、
    环境声与配乐。

    让声音衔接自然、主次清楚。

每一遍只集中解决一类问题,避免节奏、效果和声音同时改动。

04 · 剪辑 / 分层合成

把片头拆成三层,让画面与标题各自可调。

片头驾驶位人车底图
底层 · 人车画面
带透明背景的车场示意图层
中层 · 车场示意 · 透明层
带透明背景的Parking Copilot标题图层
上层 · 标题文字 · 透明层
三层素材合并后的静态预览
叠加后的静态预览

三层叠在同一个 0–2 秒片头里。
底图可以轻推,标题保持稳定。

需要修改哪一层,就只调整哪一层。

04 · 剪辑 / 旁白与字幕

用旁白串起故事,也给画面留出呼吸。

旁白制作

Edge TTS · Ava 声线

从英文定稿出发,
按幕生成八段旁白。

分段便于调整停顿与位置,
不必把两分钟说满。

双语字幕

根据旁白句级时间生成双语 SRT,
在剪映里调整样式与落点。

第一辆车,让我自由出发。

My first car gave me
the freedom to go.

影片收尾

One less worry.
A little more freedom.

沿用同一声线,单独生成补句,
配合片尾画面收束主题。

旁白不必填满时间,留白也是叙事的一部分。

05 · 精修 / 场景可信度

剧情说找位难,画面却像一座空车库。

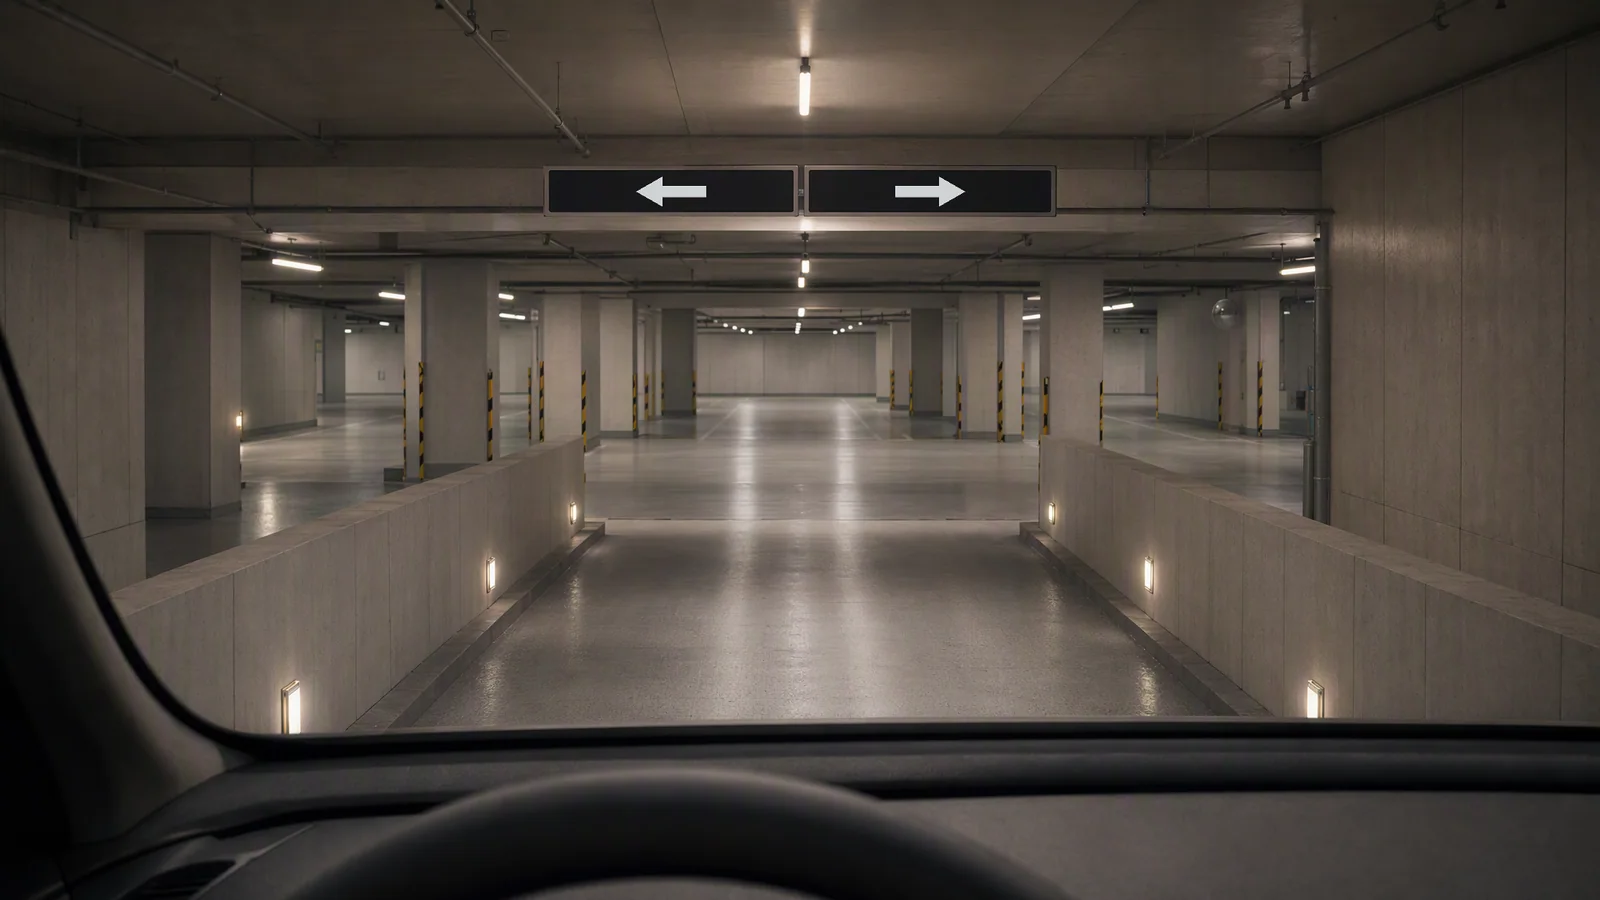
修改前的车库:左右停车区空旷
修改前 · 车位空旷
画面很干净,却削弱了找位难的前提。
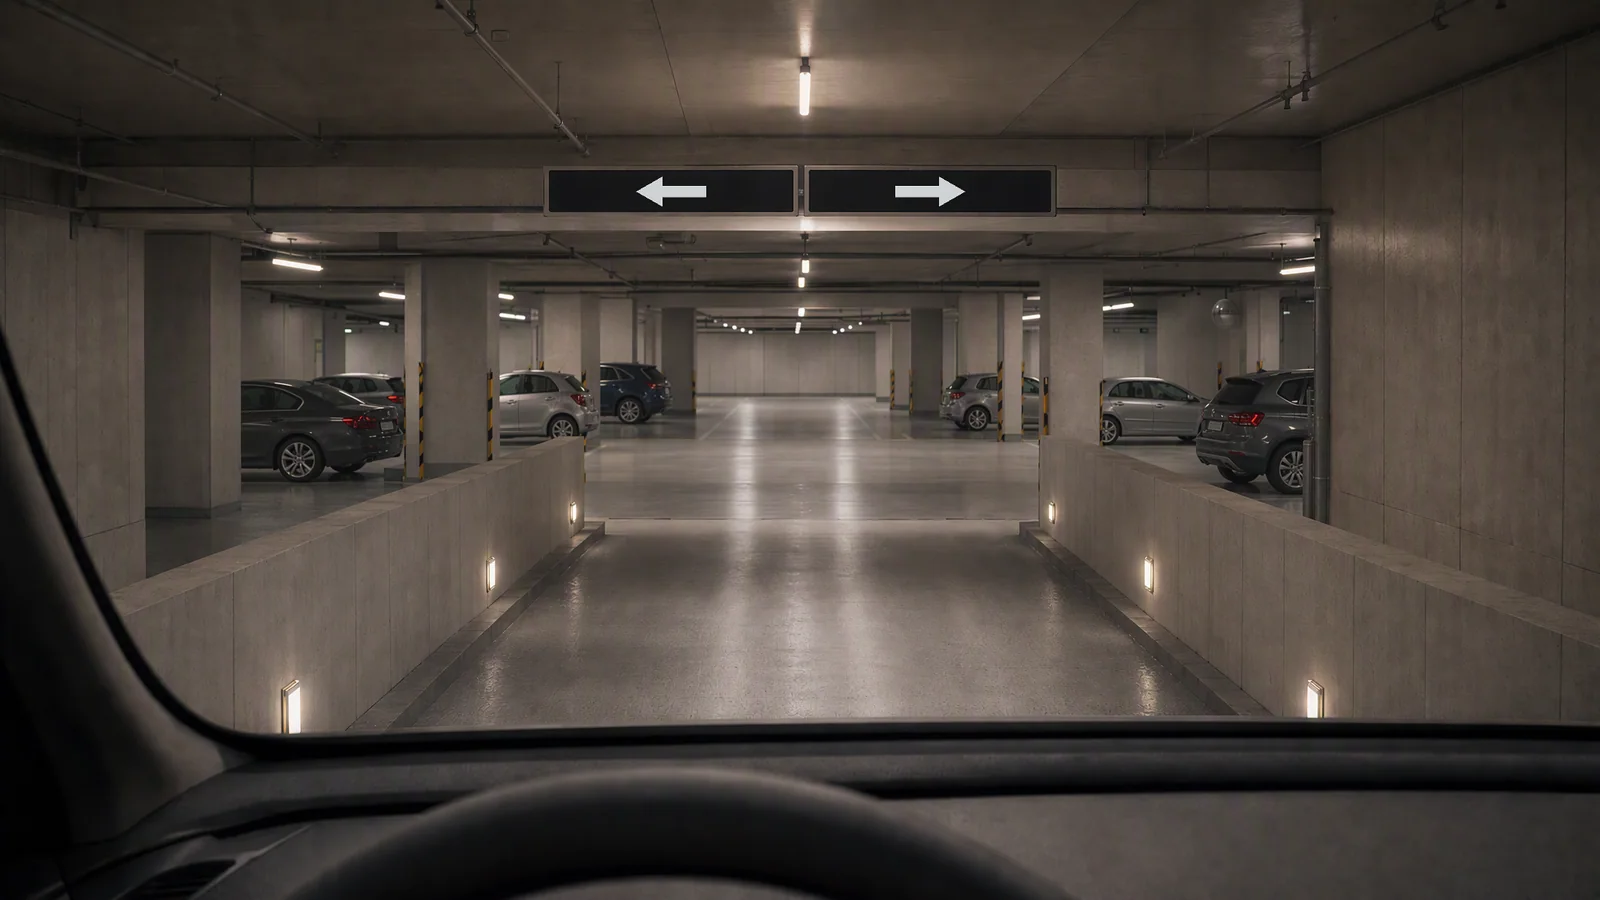
修改后的车库:两侧车位补入停放车辆,通道与指示箭头保持清晰
修改后 · 补入停放车辆
增加车位占用,同时保留清晰的通道与指示箭头。

补车不是为了热闹。环境也要帮故事说话。

05 · 精修 / 镜头连续性

单张看着自然,连起来却不像同一个车位。

未采用的停车前候选:218目标位为空,邻车与柱位围绕目标位分布
停车前 · 找到目标车位目标位空着,邻车提供位置参照
未采用的停车后候选:白车停妥,但邻车与目标位的关系无法和前镜自然对应
停车后 · 车辆停妥换了机位,邻车与目标位的关系却接不上

未采用版本逐张修补,越来越难兼顾整个停车区。
于是先停下来,重新设计两个镜头共用的空间。

05 · 精修 / 共同空间

先搭同一个停车区,再生成两个镜头。

Three.js
共同布局 · 两个机位
Three.js共同场景的停车前布局:中央空位,两侧邻车
停车前 · 中央空位
布局参考图 + 镜头 Prompt
同一个Three.js场景的停车后布局:中央白车停妥,保留两侧邻车
停车后 · 白车停妥
布局参考图 + 白车外观参考 + 镜头 Prompt

先确定车位、车辆尺度与机位,
再用 gpt-image-2 补上真实质感,生成摄影画面。

05 · 精修 / 细节收尾

统一车型,再补上车位标记与确认卡。

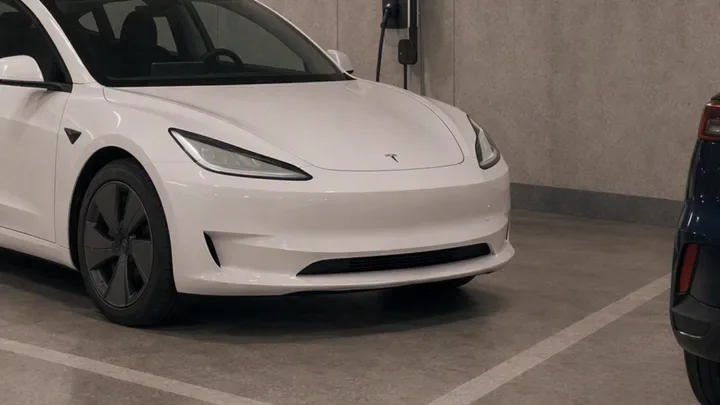
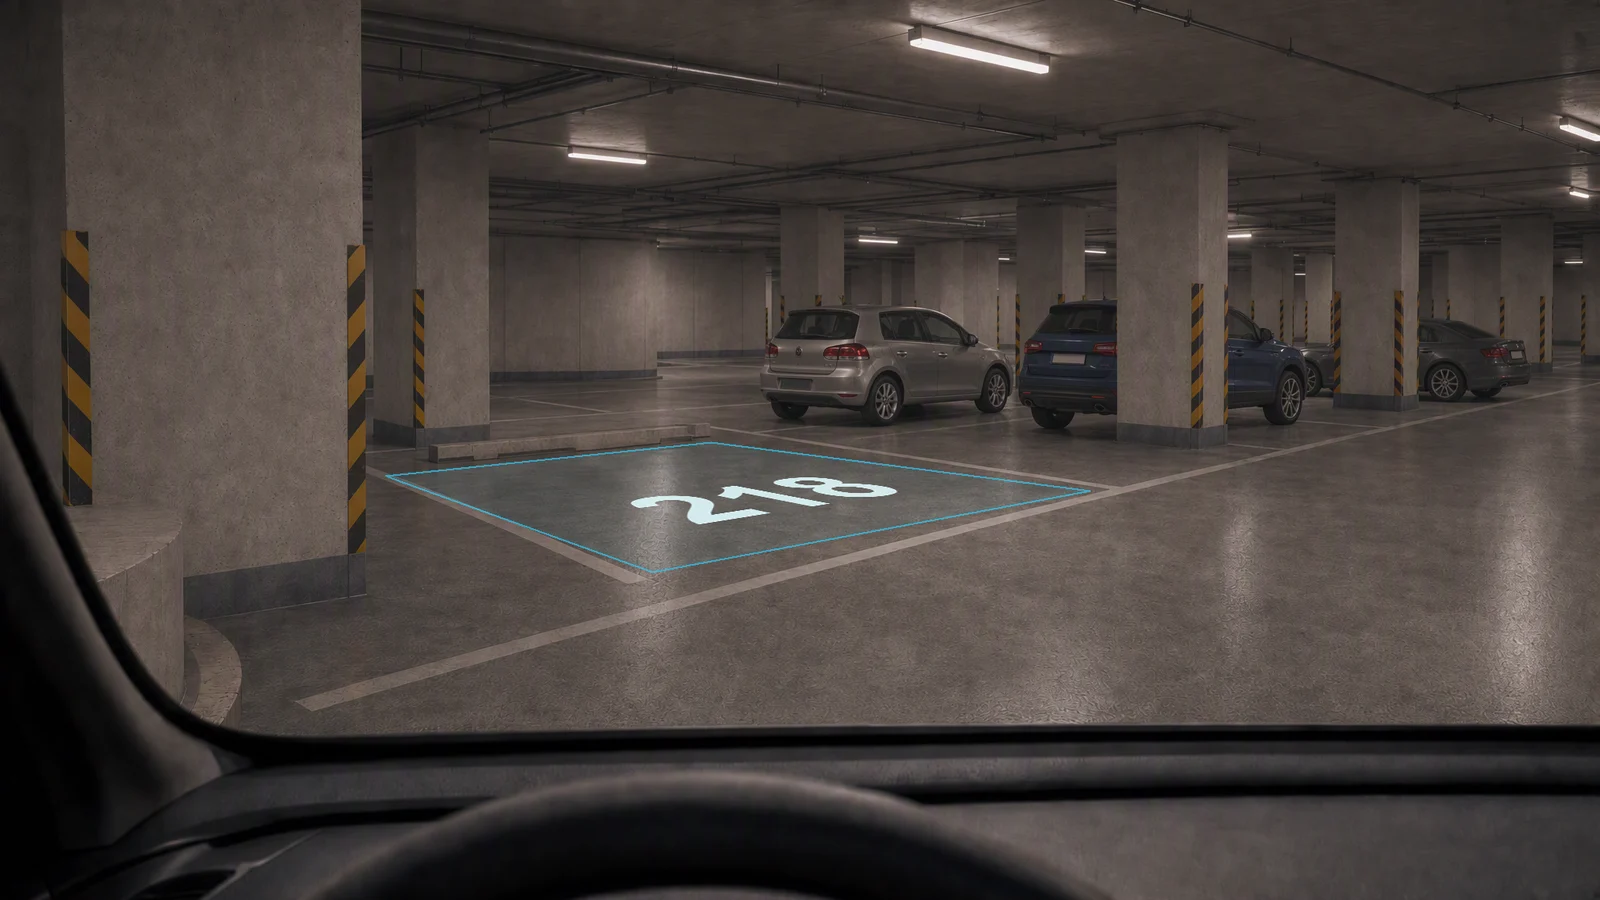
最终选用的停车前图:邻车车型已修正,中央空位带218编号与高亮框
停车前 · 目标车位
最终选用的停车后图:同一中央车位内白车停妥,右侧叠加Parked确认卡
停车后 · 位置确认

统一车型:以停车后画面为参考,修正停车前画面的邻车。
补上界面:车位编号、高亮框与确认卡,由本地代码合成。

06 · 收尾 / 片尾设计

回顾四个体验触点,让影片自然收尾。

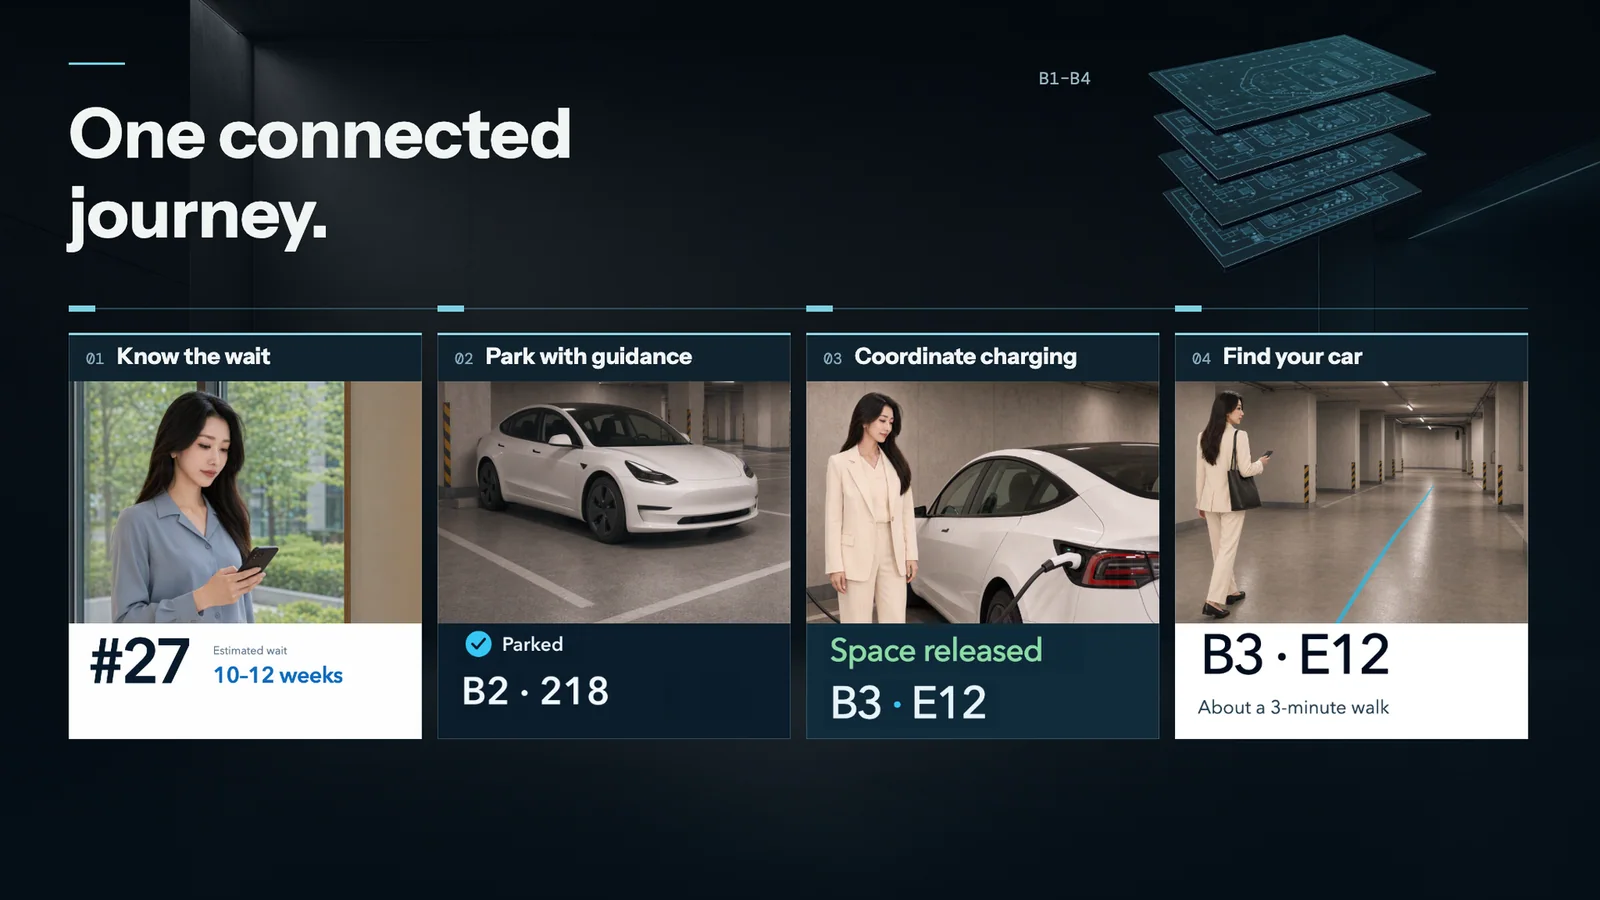
四个体验触点汇成总览:排队、停车、充电与找车
四个触点回顾 · 10秒排队、停车、充电、找车,依次出现后汇成总览。
片尾落版:Parking Copilot与The Freedom to Arrive
片尾落版 · 7秒从总览过渡到 Parking Copilot 与 The Freedom to Arrive。

复用前面的镜头与界面,
把四次体验重新编排成片尾。

Closing the loop

从一个 idea 到成片,走过这四步。

  1. 01找到故事

    从能力转向用户体验,
    用人物经历串起四个触点。

  2. 02做出镜头

    用剧本与分镜明确画面,
    再用 AI 图片、Demo 与代码制作素材。

  3. 03连成影片

    用剪辑、旁白、字幕与声音,
    组织故事的节奏。

  4. 04回看精修

    连起来看是否自然,发现问题,
    再回到镜头与设计。

故事决定镜头。镜头决定素材。

片尾衔接预览

四个触点回顾 → 片尾落版

4-10 · 停车前 · 目标空位 / gpt-image-2

完整 Prompt

共同布局生成 · 实际使用的英文原文

Image 1 为本页左侧空位布局图,是本次唯一上传参考,只约束空间、比例、方向与机位。模型负责将低模转为摄影画面;中央保持空位,218编号与高亮框留到后期合成。

Create a new photographic underground-office-parking still using Image 1 ONLY as a measured composition and spatial-layout guide. Replace the primitive blockout appearance with believable real-world photography. Do not preserve its box-shaped toy vehicles, faceted body panels or flat shading.

Scene and geometry:
Show one compact three-bay parking group in a neutral grey office garage. The central target bay is completely empty, a medium silver-grey four-door sedan occupies the bay on its left, and a dark graphite four-door sedan occupies the bay on its right. Both neighbours face nose-first toward the foreground driving aisle, with their rears toward the back wall. Keep their positions, relative body sizes and directions from Image 1. No extra vehicles. The bays are identical, approximately 2.65 metres wide and 5.4 metres deep, and the neighbouring sedans are about 4.7 metres long and 1.85 metres wide; these are proportional art-direction guides, not signs to render. Maintain visible clearance around each parked car. Do not stretch one car larger than the other, make a miniature neighbour, or widen the empty target into a double bay.

Wheel stops and boundaries:
Each bay has the same two low black rubber wheel stops with small yellow inserts, each about 0.56m wide, 0.18m deep and 0.12m tall, placed symmetrically at the rear-wheel positions. Keep the two target-bay stops visible and aligned at the same setback as the neighbours' stops, allowing real occlusion by parked vehicles. Exactly two stops per bay, not a single concrete beam or an invented pile of blocks. Match the white boundary lines and column locations from Image 1; columns remain outside the car envelopes. All tires rest on the ground, parked bodies remain within their bay markings, and the foreground aisle remains clear.

Camera and image hierarchy:
Use Image 1's driver's-eye-height camera in the aisle on the same side of the parked-car axis. Look slightly toward the empty central bay; show its clear entry and both side lines. Keep the central empty bay readable and the two neighbours secondary. An extremely narrow dark windshield/dashboard edge may be visible at the bottom but must not cover the target floor, change the camera or add a person. Do not mirror the image or turn either neighbour around. Keep the target and neighbours at Image 1's perspective, not a newly invented garage view.

Photographic finish:
Realistic everyday sedans with curved sheet metal, normal tires and wheels, understated lamps, black window trim and natural glass. The left silver-grey sedan and right graphite sedan are both ordinary similar-sized four-door cars, not SUVs or sports cars. Use soft neutral overhead strip lighting, plain light-grey concrete walls and columns, subtle ceiling pipes, matte grey epoxy floor with very mild reflections and natural contact shadows. Concrete is smooth-to-finely-grained, not a repeated swirled, embossed, stippled or etched pattern. No dramatic headlights, glossy showroom floor, fog or coloured lighting. Keep the real-world scale and camera of the layout while improving materials and automotive realism.

Use case and constraints:
This is shot 4-10: the driver recognizes a specific available space, not a panoramic tour of an empty garage. The following shot shows the white protagonist car parked in this exact central bay. Do not put that white car here yet. Leave the empty floor unnumbered for local perspective-compositing of 218. No text, digits, signs, arrows, bay number, cyan line, glowing boundary, map, interface, logo, readable licence plate, person, hands, white car, extra car, extra bay or collage. Return one complete 16:9 photographic scene, 2048x1152, not the blockout, not a grid and not a drawing.

4-11 · 停车后 · 白车停妥 / gpt-image-2

完整 Prompt

共同布局生成 · 实际使用的英文原文

Image 1 为本页右侧停妥布局图,约束空间与尺度;Image 2 为早期白车细节参考,只约束白车外观,不继承其室外背景。两张布局分别用于两次生成,本次没有上传前一个镜头的新输出。

Create one new photographic parking-result still. Image 1 is ONLY a shared three-dimensional staging and scale guide; Image 2 is ONLY the visual reference for the central white protagonist sedan. Produce realistic photography, not the primitive blockout or an edit of a previously generated garage.

Scene and shared parking layout:
Reconstruct Image 1's exact small three-bay arrangement in a neutral grey office garage. The central white sedan is now reverse-parked and centred in the central bay, nose facing the foreground driving aisle. A medium silver-grey four-door sedan occupies the bay on its left and a dark graphite four-door sedan occupies the bay on its right. All three cars face the same aisle; do not turn a neighbour around or mirror the frame. The earlier target-empty view uses the same bay, neighbours, wheel stops and background. Keep the same column locations and clear front aisle from the guide. Each bay is approximately 2.65m wide and 5.4m deep; the sedans are about 4.7m long and 1.85m wide. These numbers guide scale only. Preserve realistic side clearances and parking depth, four wheels on the ground and no body/column/line intersection.

Stops and floor:
All bays have the same two low black rubber wheel stops with small yellow inserts at the rear-wheel positions, each about 0.56m wide, 0.18m deep and 0.12m tall, at the same setback. The white car's rear wheels sit just ahead of its stops, with no wheel perched on top. Allow stops to be naturally hidden by the cars rather than inventing extra blocks in front. Keep the white side lines, target bay width and aisle boundary from Image 1. No mismatched long concrete bars, oversized stops or different stop systems between bays.

Hero vehicle and reference roles:
Replace the central white blockout proxy with the white Tesla Model 3-style four-door sedan represented by Image 2. Preserve its white paint, low sedan proportions, slim front lights, dark aerodynamic wheels, black window trim, dark glass roof, white mirrors and dark flush door handles. Use Image 1 to keep its physical size comparable to the neighbours and completely inside its bay. Image 2 is a car-detail crop only: do not bring in its outdoor light, pavement, greenery or background. Do not make the white car an SUV, enlarge it to fill the frame, copy a cropped body, or render readable license text. Replace both neighbour proxies with ordinary realistic sedans, not blocky toy cars; retain their restrained colours, equal scale and orientation.

Camera and story:
Use the guide's exterior front-right three-quarter camera from the clear aisle. This is the settled parking result, not a moving car or a parking manoeuvre. The white car's complete silhouette is the primary subject in the left/central two-thirds; keep a calm region on the right for a later small editorial Parked card, but do not move a column or distort the scene to make space. Do not add an interior dashboard: the previous shot was the driver's discovery, this one is outside the car. Doors shut, wheels straight, lights subdued; any cabin occupant is not visible or identifiable. Nobody stands outside or exits the car.

Photographic treatment and constraints:
Soft neutral overhead strip lighting, plain light-grey concrete and understated ceiling pipes, matte grey epoxy floor with faint reflections, normal soft tire/chassis contact shadows. Fine photographic detail, no swirled or embossed concrete patterns, no showroom gloss, fog, exaggerated headlight bloom or coloured lights. The low-poly guide determines geometry, not final materials or vehicle styling. Add no text, digits, bay number, time, card, cyan highlight, arrow, map, interface, extra person, extra car, new garage geometry, watermark or collage. The original Parked / B2 218 / 08:47 card is added locally afterwards. Return one full 16:9 photographic scene, 2048x1152.

共同布局之后 · 中间版本

空间接近了,邻车却换了车型。

同一组布局参考生成的两张摄影底图 · 尚未统一车型或添加界面

重点看两图左侧银车的前脸:颜色相近,但格栅与灯组不同。右侧深灰车的前脸也有差异。共同布局约束了空间,却没有自动固定两次生成中的车辆外观。

共同布局生成后的中间版本:左为停车前,右为停车后;左侧银色邻车跨镜更换车型
后续保留右侧的停车后底图,以其邻车为参考,只修正左侧停车前底图的两辆邻车;车型确认后,再分别合成车位标记与停车确认卡。

4-03 · 车库补车 / gpt-image-2

补车修订 Prompt

实际使用的完整英文原文

Image 1 是同一镜头的无箭头底图;页面左图已叠加箭头,不能直接当作本次上传输入。模型只补停车区内的车辆,指示箭头在生成后本地合成。原文的六辆为生成目标,重点是让车库显得正常使用,同时保留空位与通行空间。

Edit Image 1 by adding six realistically parked everyday passenger vehicles inside the existing parking bays beyond the ramp. This is a precise occupancy edit of the supplied photograph, not a new garage design.

Scene:
Keep the same underground office parking garage, exact windshield viewpoint, framing, perspective, concrete columns, low ramp walls, ceiling beams and pipes, strip lights, protective yellow-black corner markings and dry lightly reflective floor. The camera remains inside the same left-hand-drive vehicle before the first junction. The ramp foreground, its landing, the transverse junction and the central driving aisle must remain open and usable.

Subject:
Place three stationary commuter cars in existing marked parking bays along the left-side parking band beyond the low ramp wall, and three in existing marked bays along the right-side parking band. Distribute them through near-middle and deeper visible bays, using realistic perspective and natural partial occlusion behind the original columns. Use a charcoal sedan, a silver hatchback and a muted dark-blue compact SUV on the left, and a dark-grey compact SUV, a silver sedan and a muted grey hatchback on the right. Place each car completely inside its own existing bay; orient it consistently with that bay's floor markings. Do not park a vehicle on the ramp, at the ramp mouth, in the transverse junction or across the central driving lane. Retain a few visible unoccupied bays between or beyond parked cars, rather than implying that the whole garage is full.

Important Details:
All six vehicles are parked, switched off, and unoccupied, with normal proportions, tires resting on the floor, restrained reflections and contact shadows consistent with the existing ceiling lights. Keep a varied but ordinary office-commuter appearance, not a showroom of identical cars. Vehicle scale must agree with the original bay widths, columns and ceiling height. Keep original columns intact in front of any naturally occluded vehicle parts. License-plate surfaces should remain visually indistinct without readable invented identifiers. Preserve the quiet neutral concrete colour grade, brightness, saturation, material texture and subtle floor reflections; add only the local shadows and reflections caused by the parked cars.

Use Case:
One complete 16:9 photographic still for shot 4-03 of an existing film. The image should make the garage look normally used while a newcomer still needs guidance to locate a suitable free space. It must not portray a traffic jam or the last remaining bay. The two existing overhead dark rectangular sign faces stay blank at exactly their current positions and sizes; the original left/right arrows will be added locally afterwards.

Constraints — Change / Preserve:
Change only occupancy of the existing side parking bays by adding the six vehicles and their physically necessary shadows and reflections. Preserve the camera, all architecture and floor markings, blank overhead signs, side mirror in the garage, lights, low walls, windshield, black left A-pillar, dashboard and steering-wheel crop. Keep all travel lanes unobstructed. Preserve the original image geometry without cropping, zooming, mirroring or repositioning objects. Add no person, driver, hands, extra cabin, moving car, headlights, queue, barrier, new wall or new parking-bay layout. Add no text, digits, arrows, bay number, floor label, logo, cyan route, destination highlight, UI, map, border, collage or watermark. Return one clean edited photographic scene plate.

第一幕 · 交付文件示例

剪映逐镜实操指南

Jianying_Guide.md · 首次导入与后续更新节选

以下节选整理自第一幕实际交付指南,展示当时的操作写法。首次导入部分保留当时的10秒工程时码;临时旁白和参数属于历史方案,不是当前成片的重做要求。已省略内部素材路径与链接,原始指南未改动。

01 · 建立项目与导入素材

目标:用5张原图+1段导航合成视频,在剪映内完成可继续精修的10秒第一幕。

  1. 在项目/草稿设置或播放器比例入口确认 16:9、SDR/Rec.709。画面导出目标为1920×1080。
  2. 在“媒体 → 本地 → 导入”中选择本包 01-picture 的六个文件。
  3. 对照下表核实缩略图及文件名。导航选的是带车内环境的MP4,不是UI源视频,也不是空屏图片。

原指南按24fps说明帧时码;若软件只能按秒排片,导出时明确24fps,再核验实际文件。

02 · 第一遍:只排时间,不加效果

将素材拖到最下方主画面轨,依次排列;可用吸附帮助对齐。下表起点包含,终点不包含,后一镜从前一镜终点开始。

第一幕六镜 · 初次10秒工程的局部时间
镜号素材起点 / 秒终点 / 秒帧数
1-01工牌与 freedom 钥匙卡0.0001.50036
1-02车边纪念照1.5003.00036
1-03美甲手部3.0004.50036
1-04车内侧脸4.5006.00036
1-05Work 导航合成视频6.0007.50036
1-06驶向办公室7.50010.00060

导航视频保持 100%速度、源入点0、全部36帧。不延长、不加光流、不复制末帧,也不要为了补时间把它变速。

03 · 第二遍:在剪映里做图片运动

  1. 播放头放在该片段第一帧,设置起始缩放/位置,点击对应属性右侧的菱形关键帧。
  2. 播放头移到该片段最后一个可见帧,修改到结束值。若没有自动出现第二个菱形,再手动添加。
  3. 仅做一个主运动,不同时套照片“入场动画”、组合动画和缩放关键帧。后者会叠加导致跳动或裁脸。

这里摘录通用操作,不照搬后来已换构图的1-02旧缩放、位移参数。具体效果仍需在播放器里检查。

04 · 声音分轨(当时的方案)

这些是轨道职责,不要求剪映显示同名轨道。若版本不能重命名,保持上下顺序并在备注中记录。

本次首包不含BGM或音效,指南提供选材和落点建议;后期已定稿的Ava、字幕与音乐不按这段历史说明重导。

05 · 导出前检查

导出后打开实际MP4,从头到尾看一次,再对照以下关键点:0秒工牌、3秒手部、6秒Work、7秒点击、7.5秒出发外景、10秒结束。

06 · 后续更新:只替换1-02自拍图

这一段来自指南顶部后来补入的单镜替换说明,与首次建工程步骤分开阅读。

  1. 先保存并备份草稿,关闭再打开,检查时间线里的画面是否刷新,不能仅凭媒体库缩略图判断。
  2. 若旧缓存或另一份副本仍在使用,以独立v4原图替换该单片,保持36帧,复核已有缩放/裁剪/关键帧和相邻切点;不要波纹删除、重新插入或清空未知缓存目录。
  3. 新v4是膝部以上构图,旧“保鞋子/脚底”的参数不再适用;检查脸和手机不被现有裁剪遮挡,其他镜头与声音不动。

旧工程的1-02位于1.5–3秒;加入2秒片头后的对应区间为3.5–5秒。实际操作核对当前工程,不只凭旧表定位。素材交付记录不等于最终原生工程的独立验收。

Lexie · 角色参考图 / gpt-image-2

完整 Prompt

初版生成 + 裤装调整 · 两次独立请求的英文原文

第 1 步:两张原始人像分别约束脸部身份与身体比例,生成角色母版 v1(原始人像不展示)。第 2 步:只上传 v1,将炭灰长裤调整为米白色,得到页面所示的 v2。以下是两次独立请求,不能合并成一次执行。

STEP 1 — Create the character reference (v1)

Create one square 2-by-2 casting reference sheet. Use Image 1 as the exact primary facial-identity reference. Use Image 2 only as the supporting full-body proportion and hair-length reference; Image 2 must not override the face from Image 1.

Scene:
A clean 2-by-2 grid on a uniform warm-neutral gray studio background (#D8D3CC), with narrow even gutters and no outer decorative border. Soft, broad, neutral daylight comes from camera-left with gentle fill from camera-right. Lighting direction, white balance, exposure, skin tone, background, and wardrobe remain identical in all four panels.

Subject:
The exact same recognizable East Asian woman from Image 1 appears once in each panel. Preserve her real facial identity from Image 1: the same slim oval face, almond-shaped dark eyes, natural eyebrow shape, nose structure, lips, jawline, warm natural skin tone, hairline, age, and individual asymmetries. Use Image 2 to preserve realistic shoulder-to-waist, leg-length, height, and long-hair proportions. Dress her consistently in a lightly structured warm-ivory blazer over an ivory matte blouse, charcoal straight-leg trousers, simple dark flat shoes, and small understated stud earrings. Natural minimal makeup; visible real skin texture.

Important Details:
Top-left panel: head-and-shoulders front view, face perpendicular to camera, direct eye contact only for identity inspection, closed lips, calm neutral expression, hair resting naturally behind one shoulder.
Top-right panel: head-and-shoulders three-quarter view turned approximately 35 degrees toward frame-right, eyes looking slightly beyond camera, closed lips, calm attentive expression.
Bottom-left panel: waist-up clean side profile facing frame-right, both eyes and nose silhouette physically coherent, head level, shoulders relaxed, closed lips.
Bottom-right panel: full-body front three-quarter standing view, feet fully visible on the same neutral floor, arms relaxed naturally at her sides, balanced posture, realistic body proportions and garment drape.

All four panels depict one person during the same studio session. Keep the exact same face, hairstyle, hair length, earrings, wardrobe colors, garment cut, body proportions, and lighting. Leave enough resolution on the three face panels to inspect eyes, nose, lips, jawline, hairline, ears, and natural skin texture. The full-body panel is functional wardrobe and proportion reference, not a fashion pose.

Use Case:
Private production identity reference for deriving consistent photorealistic stills across a workplace short film. This sheet is not a final movie frame and contains no story environment.

Constraints:
One sheet with exactly four panels and exactly one instance of the same woman in each panel. Image 1 has priority for every facial feature; Image 2 contributes only body proportions and hair length. Do not blend, average, beautify, age-shift, ethnicity-shift, slim, reshape, stylize, or reinterpret her face or body. Keep lips closed in all panels. Keep hair length, part, texture, and color consistent. Keep the same blazer, blouse, trousers, shoes, and earrings in every panel. Ignore the pink striped top, jeans, beige sweater, leather skirt, handbag, tall boots, large flower earrings, yacht, lake, trees, and all hand gestures from the references. No labels, captions, names, measurements, height lines, logos, watermark, jewelry changes, glasses, handbag, phone, vehicle, office, outdoor scenery, dramatic colored light, glamour retouching, airbrushed skin, exaggerated smile, duplicate limbs, extra fingers, cropped feet, or additional people.

STEP 2 — Update the trousers (v1 → v2)

Edit the supplied 2-by-2 character reference sheet in place. This is a small wardrobe continuity update to an established character master, not a new character sheet. Change only the existing charcoal trousers in the bottom-right full-body panel to warm ivory suiting fabric. Return one complete square 2-by-2 sheet, with all four existing panels kept in the same positions and proportions.

Change:
In the bottom-right full-body panel, recolor the existing high-waisted straight-leg trousers to a restrained warm off-white that harmonizes with the woman's existing cream blazer and ivory blouse. Preserve the same matte woven suiting texture, original waistband, tailoring, folds, leg width, hem height and ankle exposure. Retain visible creases and softly shaded folds, so the trousers keep their volume and do not become a flat white patch. Use the same neutral studio light already present in the source image. The update should read as a coordinated ivory outfit, not pure overexposed white, glossy satin or yellow fabric.

Preserve:
Keep the top-left front portrait, top-right three-quarter portrait and bottom-left side portrait unchanged in identity, facial features, expression, pose, hairstyle, clothing, lighting and framing. Preserve the bottom-right woman's exact face, age, hair, earrings, body proportions, shoulder width, waist, leg length, hands, standing pose and foot positions. Keep the original cream blazer, ivory blouse and dark flat shoes exactly as they are. Preserve the neutral studio background, floor shadows, camera perspectives, panel sizes, narrow dividers, white balance and overall exposure. Do not re-style, beautify, slim or elongate the character. The original master is the only authority for identity and anatomy.

Constraints:
Only the trouser color changes. Do not add high heels, new shoes, jewelry, makeup, a new nail design, labels, text, logos, measurements, a new pose, an extra person or additional panels. Do not turn any portrait into a full-body image or reveal clothing that was outside its existing crop. Do not replace the sheet with a different casting photo. Do not brighten the whole image or repaint the woman's skin in order to make the trousers lighter. All four panels must remain the same established woman; use the original panel content rather than inventing a new face. No collage comparison or before-and-after arrangement beyond the original four-panel reference layout.
1-02 · 车边纪念照 / gpt-image-2

完整 Prompt

镜头 v3 · 实际使用的英文原文

Image 1 为原始人像参考(不展示);Image 2 为已有站姿无字图,用于参考白车、米白服装与人车位置。左侧角色母版在本次生成中仅作本地核对,未重新上传。输出即本页 v3,尚有视线与手部问题,下一页继续修订为 v4。

Create one natural photographic storytelling frame of a woman taking a personal commemorative selfie with her first car. Use the two references only for their explicitly assigned roles. This is one candid moment, not a car advertisement, fashion pose, collage or screenshot from the phone.

Reference roles: Image 1 is the sole authority for the woman's facial identity, recognizable proportions and long dark hair. Do not transfer its boat, sea, vacation clothes, large flower earrings or gestures. Image 2 supplies the white Tesla Model 3 exterior, ivory tailored outfit and the broad front-three-quarter relationship of a woman standing near the car's front-side corner, with the car's nose directed toward image left. Do not copy Image 2's hand resting on the hood, direct look into the photographer's camera, nighttime showroom, dramatic presentation lighting or large empty title area. Where the woman's features differ, prioritize Image 1.

Scene: A quiet contemporary office-campus forecourt in early morning, with soft warm daylight, understated glass architecture and greenery gently out of focus. The car is stationary in a safe paved parking area. Keep the setting ordinary and uncluttered without recognizable company signs, license plates or readable building labels. Natural daylight and car reflections connect to a morning commute, not a nighttime exhibition.

Subject and action: The woman wears the approved ivory blazer, ivory inner top, matching straight-leg trousers, discreet small stud earrings and dark flat shoes shown by the outfit in Image 2. She stands beside the near front-side corner of her white car, comfortably away from the hood rather than leaning on it. She holds one dark smartphone vertically in her right hand, at a comfortable arm's length just above eye level. The phone screen and front-facing camera face her and the car behind her; the main film camera sees the phone's plain back and rear camera module. She looks at her own screen with a small, genuine closed-mouth smile, proud and quietly pleased. Her other arm rests naturally at her side. Keep her face fully visible and the raised phone clear of her face. No hand touching the hood, crossed model stance or eyes addressing the main camera.

Framing: Use an outside observer's medium-full three-quarter view, roughly from her knees upward, with her head and raised phone comfortably inside the frame. Keep the front light, hood edge and a substantial portion of the side doors and windows visible, so the white Model 3 is recognizable as the object of her celebration. The car faces image left. Arrange the woman's position at the near front corner and the phone in front of her so a believable wide-angle front camera can include her and the car behind her in the same selfie. Prioritize her expression and the simple phone gesture at a 1.5-second viewing time. Fill the composition with the person and car; do not reserve a large blank region for titles, shrink her into a full-car catalog shot or crop away the phone. Preserve realistic arm length, body proportions, natural wrist angle and human grip.

Use case and constraints: This frame communicates "I finally bought my first car" through a personal action, not through a label or corporate slogan. One woman, one phone, one foreground white left-hand-drive Model 3. Preserve plausible headlights, black flush door handles, mirrors, wheel shapes and connected body panels; doors are closed and the car is not moving. No duplicate people, extra fingers or limbs, floating phone, visible screen text, artificial beautification, dramatic makeup, high heels, map, cyan navigation line, hologram, title, watermark, border or inset. Render a single coherent opaque 16:9 photograph with natural skin texture and restrained warm morning light.

1-02 · 车边纪念照

完整 Prompt

自拍姿态修订 · 实际使用的英文原文

Edit this single reference photograph in place to correct the woman's selfie pose. Preserve the photograph's composition and scene. Return one complete photograph, not a comparison or collage.

Change the raised RIGHT hand and its perspective: This is her anatomical right hand, currently on the LEFT side of the image. Keep that hand holding the same vertical dark smartphone. Relax and slightly bend the right elbow so the forearm extends sideways toward the phone rather than strongly toward the main photographer. Bring the hand and phone a little closer to her depth plane, while retaining a comfortable arm's-length selfie distance and keeping the phone clearly left of her unobstructed face. Reduce the exaggerated apparent size of the palm, fingers and phone together; aim for roughly a fifth less projected size than in the reference, guided by believable adult anatomy rather than a tiny doll hand. Keep a continuous, proportionate shoulder–sleeve–forearm–wrist connection, a natural wrist angle and relaxed fingers holding the phone securely. The lowered left hand is unchanged.

Change head orientation and gaze together: Turn her head naturally toward her own phone on IMAGE LEFT. Her nose and chin should point visibly toward the phone, producing a gentle three-quarter face, not a frontal face addressing the main camera. Both eyes focus naturally on the upper part of her phone screen near its front camera. Let her head, pupils and the phone's inward-facing screen form a coherent sightline. Do not merely slide the pupils sideways within a front-facing head. Keep her small, pleased closed-mouth smile, recognizable facial proportions, long dark hair and small stud earrings. Make the shot read immediately as a private selfie with her first car, not as a portrait taken by another photographer while she holds up a phone.

Preserve: The woman's identity, face size, standing position, torso and leg proportions, ivory blazer and inner top, ivory trousers, relaxed lowered arm, and the existing morning color grade. Preserve the stationary white Tesla Model 3, its image-left nose direction, headlights, hood, side doors, black flush handles, mirror, windows, wheels and reflections. Preserve the paved parking area, glass buildings, trees, greenery, warm daylight, shadows, camera framing, crop and depth of field. Keep the person and car at their current scale; do not solve the hand problem by shrinking the whole woman, zooming out, changing to a wide-angle lens or recomposing the scene.

Constraints: Only one woman and one phone. Keep the screen facing her and the phone back facing the main photographer; small angle/position adjustments are allowed only to make the selfie geometry natural. Do not switch to her left hand, mirror the image, add a selfie stick, show readable phone content, add or fuse fingers, enlarge the palm, stretch a finger, disconnect the wrist, hide the face, change the car or invent new props. No retouching that changes her identity, no new makeup, no text, watermark, map, cyan route, UI, border or inset. Deliver one opaque 16:9 photograph. Local edits may reconstruct hair and sleeve edges naturally; do not paste isolated smaller hands or eye cutouts onto the image.